Archive for August, 2011

Alice Madness Progress Update

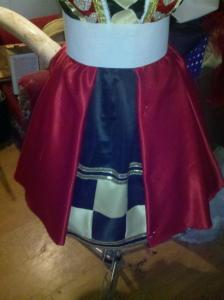
Did a little more work on the dress this week. I should be finished soon. All that is left is details like rhinestones, trim, applique. I also started carving the basic shape out for the Catnip Cannon out of the expanding foam. The stuff is pretty easy to carve, but it’s pretty messy stuff. I’m finding foam flakes allover the house!


I need to take better pics of the dress. My camera is not cooperating, so it’s cell phone pics for now. when I’m done with everything, I will do a full photoshoot in the dress.


I was asked in an email where I got patterns from. To be honest, I make my own. the only thing I used a pattern on was the underskirt. It was a basic Simplicity pattern that I adapted. Look for a gathered skirt pattern. The bodice is just a basic bodice that I adapted. It’s not exact to the game but since in general, most women don’t have 15 inch waists like Alice it safe to presume that looking exactly like Alice in body form is impossible unless you are an anorexic! I am top heavy with a Hourglass figure, so I took that into account when I made the patterns for the bodice. It is tailored within an inch of it’s life. For me, the key that separates a good costume from a great costume is how well it fits and details. So these are the things I am focusing on.


I noticed in another blog that someone was referring to my build on here. Their complaint was the trim. Well, I’m not finished with it yet!! As for applique? It’s not hard to do at all.

You will need Steam-a-steam Bonding sheets or you can also use Heat and Bond Light. Do not get the heavy stuff if you plan on doing any stitching on it. My blog on Supergirl costume from last year has a tutorial on how to do basic applique. You don’t even have to know how to sew. My word of advice is that if you want a costume like this, learn to do it. It’s a handy skill to have when making costumes. It opens up a lot of opportunity for detail work that sets your costume apart. When I get back from Dragoncon, I will do some tutorials on Applique again, more detailed and step by step. I’m considering doing some how to videos for youtube if anyone is interested.

Until later!!
Madness Dress Update and Catnip cannon!!!

Did a little work this weekend. I have not been feeling too good (Back issues) and with the insanely hot weather lately, kind of lazy.

Dress is hemmed, now to add the handmade trim on the red outer skirt, apron is cut out and I decided to make the giant bow stiff, to use buckram as a base.


I started on the Catnip Cannon (Cheshire Cat Canon)

Here is what I it is based on:


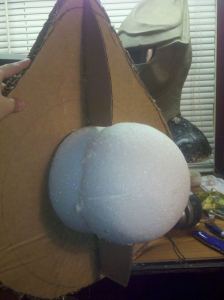
I started by taking some industrial Strength Cardboard I had around from when I was doing renovations in my house (My Bathtub was shipped in it). The stuff is very thick, about 1/2 an inch. It’s good stuff, difficult to cut. I ended up using a Linoleum Knife to cut it and even that was a struggle. But I needed something stable and able to handle the expanding foam. I used regular Cardboard for the stabilizing pieces. I used a Styrofoam ball cut in half, stacked and glued together as the base of the eyeball.


Next, I started layering on the Expanding Foam. This is foam in a can that you can buy at any hardware store. I started out with 3 extra-large cans and ran out fast. Always buy more than you think you will need. Also wear gloves, this stuff is like superglue if it dries on your hands. I had to use Lacquer thinner to get it off. It can also be messy at first, so make sure you spread some newspaper out. Keep in mind that it will expand after applying and to make sure you fill any spaces up before it starts to set. You can see in picture below after it expanded, it spilled over to cover the cardboard edges. this is a good thing. You want to retain the shape for carving but you also want to make less work for yourself. Do a little at a time and get used to how the foam sets. Some foam brands expand more than others. There is a variety of brands on the market.

I used Touch and Foam. It is triple expanding made for larger spaces that need filling.


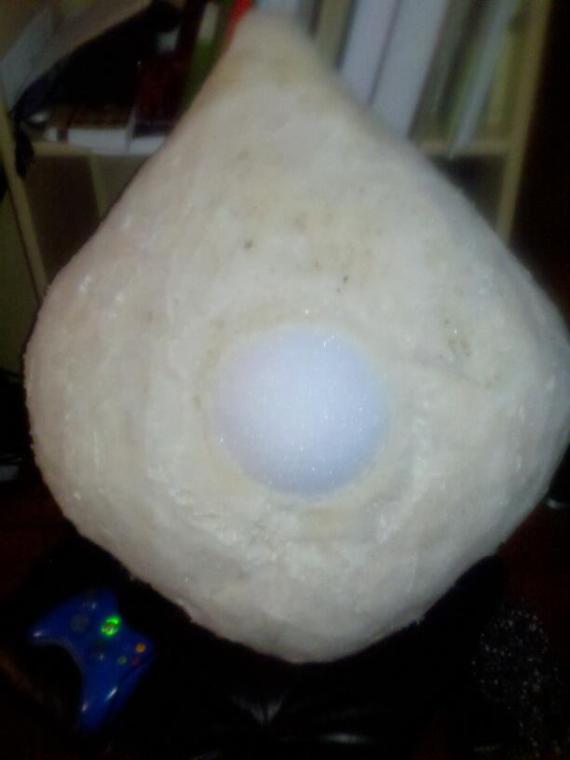
This is what it looks like after expansion. When I applied it, it did not go over the edges at all. So play around with it first and see what it will do before just spraying the whole thing.

Once the Foam has completely dried inside (about 8 hours needed, the outside sets up in less than 30 minutes but it’s gooey inside), then you can begin carving, I am using a utility knife for most the carving. this is all experimental for me. I’ve not done this before, so I hope it turns out.

After carving, I will go back and fill in the holes with more expanding foam using a putty knife. After it is dry, I will cover with Painters tape and then using a wallpaper adhesive will apply a layer of paper mache, then polymer coating to smooth it out. All the attachments like the spout, handle and feet with be made using EVA Foam and maybe molds and hot glue technique that Evil Uses for his Guyver suits.