Posts from the ‘Costume’ Category

Alice Madness Progress Update

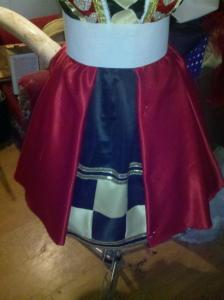
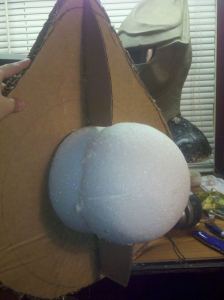
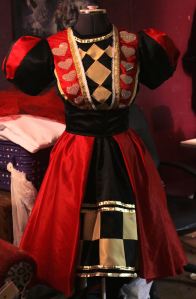
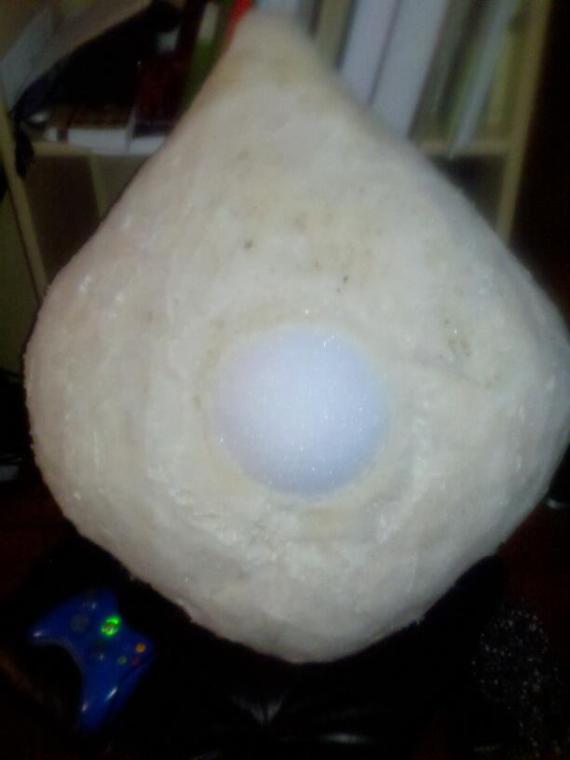
Did a little more work on the dress this week. I should be finished soon. All that is left is details like rhinestones, trim, applique. I also started carving the basic shape out for the Catnip Cannon out of the expanding foam. The stuff is pretty easy to carve, but it’s pretty messy stuff. I’m finding foam flakes allover the house!


I need to take better pics of the dress. My camera is not cooperating, so it’s cell phone pics for now. when I’m done with everything, I will do a full photoshoot in the dress.


I was asked in an email where I got patterns from. To be honest, I make my own. the only thing I used a pattern on was the underskirt. It was a basic Simplicity pattern that I adapted. Look for a gathered skirt pattern. The bodice is just a basic bodice that I adapted. It’s not exact to the game but since in general, most women don’t have 15 inch waists like Alice it safe to presume that looking exactly like Alice in body form is impossible unless you are an anorexic! I am top heavy with a Hourglass figure, so I took that into account when I made the patterns for the bodice. It is tailored within an inch of it’s life. For me, the key that separates a good costume from a great costume is how well it fits and details. So these are the things I am focusing on.


I noticed in another blog that someone was referring to my build on here. Their complaint was the trim. Well, I’m not finished with it yet!! As for applique? It’s not hard to do at all.

You will need Steam-a-steam Bonding sheets or you can also use Heat and Bond Light. Do not get the heavy stuff if you plan on doing any stitching on it. My blog on Supergirl costume from last year has a tutorial on how to do basic applique. You don’t even have to know how to sew. My word of advice is that if you want a costume like this, learn to do it. It’s a handy skill to have when making costumes. It opens up a lot of opportunity for detail work that sets your costume apart. When I get back from Dragoncon, I will do some tutorials on Applique again, more detailed and step by step. I’m considering doing some how to videos for youtube if anyone is interested.

Until later!!
Madness Dress Update and Catnip cannon!!!

Did a little work this weekend. I have not been feeling too good (Back issues) and with the insanely hot weather lately, kind of lazy.

Dress is hemmed, now to add the handmade trim on the red outer skirt, apron is cut out and I decided to make the giant bow stiff, to use buckram as a base.


I started on the Catnip Cannon (Cheshire Cat Canon)

Here is what I it is based on:


I started by taking some industrial Strength Cardboard I had around from when I was doing renovations in my house (My Bathtub was shipped in it). The stuff is very thick, about 1/2 an inch. It’s good stuff, difficult to cut. I ended up using a Linoleum Knife to cut it and even that was a struggle. But I needed something stable and able to handle the expanding foam. I used regular Cardboard for the stabilizing pieces. I used a Styrofoam ball cut in half, stacked and glued together as the base of the eyeball.


Next, I started layering on the Expanding Foam. This is foam in a can that you can buy at any hardware store. I started out with 3 extra-large cans and ran out fast. Always buy more than you think you will need. Also wear gloves, this stuff is like superglue if it dries on your hands. I had to use Lacquer thinner to get it off. It can also be messy at first, so make sure you spread some newspaper out. Keep in mind that it will expand after applying and to make sure you fill any spaces up before it starts to set. You can see in picture below after it expanded, it spilled over to cover the cardboard edges. this is a good thing. You want to retain the shape for carving but you also want to make less work for yourself. Do a little at a time and get used to how the foam sets. Some foam brands expand more than others. There is a variety of brands on the market.

I used Touch and Foam. It is triple expanding made for larger spaces that need filling.


This is what it looks like after expansion. When I applied it, it did not go over the edges at all. So play around with it first and see what it will do before just spraying the whole thing.

Once the Foam has completely dried inside (about 8 hours needed, the outside sets up in less than 30 minutes but it’s gooey inside), then you can begin carving, I am using a utility knife for most the carving. this is all experimental for me. I’ve not done this before, so I hope it turns out.

After carving, I will go back and fill in the holes with more expanding foam using a putty knife. After it is dry, I will cover with Painters tape and then using a wallpaper adhesive will apply a layer of paper mache, then polymer coating to smooth it out. All the attachments like the spout, handle and feet with be made using EVA Foam and maybe molds and hot glue technique that Evil Uses for his Guyver suits.


Alice Madness Royal Dress- Skirts


I finished all the hand sewing on the bodice and Got the over skirt attached. I’m really not happy with the over skirt pleating and will likely rip it out tonight and start over. This dress has very weird construction. In order to get the look in the game, I cannot completely attach the over skirt in front, which means the underskirt is now going to have to be attached to the dress rather than a stand alone underskirt. the Waistband/Bow will basically hold everything together.

I also shortened the sleeves to be more Game Correct and will have to add the sleeve bands back. They have appliqued tiny hearts on them, So I will do them separately and then reattach them.

Sorry if the hearts look lopsided, My dress form is a bit warped and lopsided, not the bodice.

I now have to make handmade trim for the skirt, the Giant Bow in the back and start working on the Skull Sculpture that is attached to the bow in the back.

Royal Dress Update-Bodice Work

I worked on the Bodice last night which is far the most important and most labor intensive of the whole dress. Finding the right fabric for the appliqued hearts was hard at first but I scored a remnant piece in the clearance bin at Joann’s 1 1/4 yards for $4. It was $14 a yard, so score! In the game the hearts definitely look like they are glistening, maybe beads or crystals. the fabric I found was a semi-opaque mirrored material. It was also light gold. I debated whether the Hearts were Gold or Pink but settled on Gold as pink seemed out of place but I think there are pink crystals on the dress in some places.And will add some here and there if I have time.


Bodice needssome adjustment and still a little more tweaking before putting on the skirt.

I need to shorten the sleeves by about an inch and will work on that tomorrow afternoon. They need to be shorter in order to show off the arm warmers properly. Right now, I have the trim pinned and it’s ready for  . I prefer handsewing as I think it will look better but I may end up machine sewing some of it. I also have picked up a new textile glue by Alene’s. Same company that makes Tacky glue. I may end up using it for the trim in some places.I did a test piece and it held very well, No puckering or lumps. I think it’s a great product. Better than any fabric glue I have used before though I still live and breathe by E 6000. That’s the glue I always go to when I need to get something to stick. The only thing about the Alene’s is that it smells like airplane glue, pretty toxic. I guess if I was a huffer (lol), I might like it better. But I’ll stick with E6000 for most of my costume making.  I’ve been through tons of tubes of the stuff, it’s never failed me.

Next I will be adding the outer skirt and work on the bow in the back, the skull sculpture on the back and the apron. I plan on making her Omega necklace out of Sculpey.


Alice: Madness Returns Royal Dress Part 2

I have always been a Fan of American McGee’s Version of Alice in Wonderland. Dark, Bloody and twisted. Right up my Alley. I know that some people may not be familiar with the Graphic Novels or the two Video games, as it is a bit of a niche fanbase. Basically Alice is now an adult who was living in an asylum, she lost her parents in a horrible fire and is now living in a home which houses the disturbed patients of a London Shrink. She goes back to Wonderland finding it a pretty twisted place. The graphics in the game range from very colorful to very dark and bloody. But the best thing about the game is that Alice has tons of costumes and props! Most know the Traditional Blue dress (In American McGee’s comic she bloodstained and carrying a Vorpal blade). In the New game, I have chosen to work on the Royal Dress which you unlock when going to see the Queen of hearts. I also plan on making a Hobby horse prop which is used like a giant sledgehammer in the game.

Royal Dress

Here are the main 4 hobby horses

The dress bodice is pretty much a custom pattern. It’s lots of princess seams and tailoring. I plan on doing applique for the diamonds and hearts and adding Crystals and beads. In the Game play, you can get a better 360 degree view.

For Fabric I am going with Bridal Weight Satins in black and red. The Giant bow in the back will be made of Black Moire Fabric to simulate the texture seen in the game. A lot of handsewing on this dress, tons of trim, some lace and small beads will be used to trim it out.

I already own a pair of Demonia boots and will be adding buckles and fake straps. The boots are hard to find in this particular style, so I plan on making the buckles from EVa Foam and Painting them.

the arm sleeves will be made from spandex and the pattern appliqued on (More handsewing!).

So far I have the main bodice, the “Snow White” Style Sleeves finished and the underskirt 90% done except hemming which I will do after I make the checkerboard trim.

Firstly, let me apologize for the crappy photos. I moved 4 weeks ago and I am still looking for my Camera Cord!!!!

Here is the bodice, sleeves and underskirt, Still lots of trim and applique to add:

Sleeve detail. Done just like a snow white dress.

Here’s the the Tentative Applique Patterns which will be made from gold fabric and trimmed out with crystals on the hearts and some gold beads around the diamond patterns.

that’s all I have done so far. It’s a lot of work. I suspect I’ll be doing lots of handsewing every night!

Jane

Alice: Madness Returns

No, I’m still working on Baroness. I moved recently and half my stuff is in storage, so While I get my workshop straight and stuff moved in, I am working on a Prop for Alice: Madness Returns Video Game. It is based on American McGee’s Alice. For those not familiar, It’s basically a very dark gothic version of Alice in Wonderland. Alice is an Adult and is living in an Asylum. The books are very imaginative. I’ve been playing the new video game for the past few days and This costume is calling out to me. The dress itself is the easy part. But in order to take this costume to a different level I feel I need a Prop. a well made one at that. So I am undertaking a project of firsts. My first time building anything made of Styrofoam and fiberglass. Getting guidance from fellow costume and propmakers, I feel I have gathered the right materials and I am ready to go.

Reference pics are the most important here. they are difficult to find. I’ve had to go into the game constantly for reference. There are 5 weapons in the game. But I have decided on …The Hobby Horse Hammer. The upgrade in the game turns it into a unicorn. Hey,  Who doesn’t like Unicorns that kill people ? Now, getting horse heads right can be difficult.  As a painter, I’ve painted horses. They are not easy to render correctly. Getting the Shape of the head right can be difficult and always proposed a challenge.  But since this is a hobby horse, I have a lot more leway when it comes to proportion. This is otherwordly, it a toy gone wrong!

Here is some reference pics:

the Red One:

the one I am leaning toward is the unicorn.

Here is a Picture of the shape

These are the best Images I can find. You have to go into the game for a better 360 degree view.

Materials:

Polystyrene Foam Insulation Sheets (Blue ones from Lowes Made by Dow, Home Depot sells Pink, same stuff)

Drywall Knife for basic cutting

Coping saw

Hot Knife

Utility knife

Rasp

Various Grit Sandpapers

Parks Super Glaze (To seal Foam)

Bondo (Original and Bondo Glass)

Water Based Primer (Kilz)

Acrylic Paints

7-6 ft, Large diameter Wood Pole

Option: Battery Power Lighting for eyes, mouth and Unicorn horn) If I have time!

1 Chain, A fake one will cut down on weight but I may just use whatever I can find at the hardware store

Updating my Blog -Finally

Well, It’s been since last summer that I updated.   Right now I am working on Two Costumes with a third planned. I have Mandolorian Armor almost done, just soft parts to finish. And I am working on a GI Joe Baroness Costume with Armor from the Comic Book. I had planned to do a Tron Legacy Costume but I hit some snags with that one but it might still pan out, if I can get what I need to finish it and find a good quality Lace front wig. I am not bleaching My hair again. Redhead I will stay!

Here’s photos of the Finished Supergirl Costume from Dragoncon 2010. I was pleased with the way it came out. I am going to Re-do the Logo on the Shirt and embroider it to give it a nice professional look. I also realized that the Plastic Paint I used was no good. So I had to removed the yellow with Denatured alcohol and start from scratch.  I wore this to the Super Hero World Record attempt. We didn’t make it so hopefully next year they will make it. Not sure I will join in this round, I go too much planned for this coming Con.

Supergirl Costume Day 1

I heard that they were having a Guinness Record Attempt for most Superheroes at DragonCon this year, so I have decided to make a Supergirl Outfit. Supergirl has always been one of my favorite Comic Characters. One of the First Comics I ever bought as  a Kid was Supergirl!!!  Hey, I’m already blonde, so I got a head start.

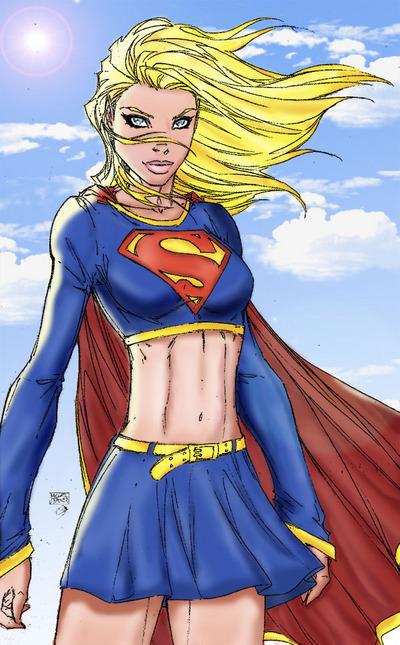
Her looks have changed over the years. As well as her Origins. For my Recreation, I’m sticking with the Turner Redesign/Kara Zor-El. 


I had a Leotard/Skate Outfit Pattern from Green Pepper. I modified it but removing the bottom and shortening it to a crop top. The pattern is easy and needed very little adjustment. I am using Spandex Lycra 4 way stretch knit in Royal Blue. Some of the Supergirl pics depict a more  turquoise color but I’m trying to get closer to Turners Redesigns when Superman Returns was released. I think the Tradition Royal Color is better anyway.  For the Skirt, I am doing a basic Circle skirt. I altered the pattern by adding a Waistband and I will be adding Belt Loops. I pretty much have everything I need for this costume lying around the house. Except the Yellow Belt. Which I have a feeling I will be doing some sort of Leather dying or making one from scratch. I even have the boots, I will add the Gold/Yellow Top design and make it removable so I can use the boots for something else later. 

Before closing up and finishing off the Crop Top (Which will be edged with gold fabric trim), I decided to do the applique for the Supergirl Symbol. I traced the Symbol over and over until I felt it was the right size and looked the way I wanted. I ended up freehanding most of it. The variations of the “S” seem to differ from picture to Picture. I tried to get as close as possible for a freehand. 


Using a Double Backed Fusible Webbing called “Steam-A-Seam”. I traced the Symbol backwards on the wrong side of the Yellow Fabric for the Cutouts. I also Traced a Separate one of the Shield Symbol, Also on the wrong side. In this case, The Dull side is the Right Side. I do not like the Shininess of the Yellow Lycra fabric I found. It’s too shiny for Supergirl. I much prefer the muted tone, so that’s what I’m going with. 

Steam-A-Seam 2


 After Cutting out the pieces, I peeled the backing off, leaving the fusible webbing behind. It’s repositionable. So it’s best to put the garment on first and find the position and mark it. 

Here’s s the applique before doing the finishing on the machine. I plan on using a Satin Stitch to give it a professional appearance and to hide my cruddy cutting. You need really sharp scissors when working with lycra. 

Logo before Machine Stitching.

 Just remember, when working with knits. It’s best to use other knits for applique because of the Stretching. The fusible webbing helps it keep it’s shape.

She-Ra Test Fitting

 I did a test fitting today. Discovered some problems and now I have to do some tweaking. The belt is going to be very different, and is currently waiting for glue to dry. I have decided to re-do the forearms a bit. I need to cut them down about 1/4 of an inch on each side and attach straps to them. The cape is just attached inside the bodice, But I am going to have tack it in the back to keep it from bugging me when it falls down. The wig is one that I had already. I will most likely use it. I almost have the strap on the headpiece right, I think it needs to come up a bit. But overall I am happy so far with the result. Once I have the new belt finished, I think the outfit will be complete. I do think I may put in those clear bra straps to keep Wardrobe malfunctionings from happen. Gotta keep the bewbs up!

She-Ra Blog Part 5

Finished the hem on the dress. I ended up taking about 3 more inches off. And doing two separate hems. One for the lining and for the dress. It gives a smooth line and makes it easier to do repairs if needed. The lining hem is slightly shorter than the dress and I tacked it in about 3 places to keep it from riding up.

I finished the chest piece decoration and the wing-like decoration on one side. I used some red vinyl that I had for the molotov costume and put about 5 layers of craft paint on it. The upper wing-like decor has a fun foam backing to make it stiff and stand up. the chest piece has buckram glued to the back to give the glue something to hold onto. I do need to touch-up the paint a bit on it, but otherwise done.

To make the pattern for the chest. I pretty much freehand it on this one. I could not find a direct on pic of the chest piece. It seems all the screen captures have her at an angle. So using several reference pics. I just freehand made the pieces until they looked about right and sized them to the front of the bodice. I just reversed them for the other side.

Pattern Cutouts

 I then traced the patterns onto the painted vinyl. Repainted over any leftover pen marks.

I used a Glue called GemTac to adhere the buckram to the back and to adhere the pieces to front of the bodice. Stacked some heavy books on it and then let it dry. It does not not take long for GemTac to set up, dries clear and after 24 hours can get wet. Since the dress is white, I anticipate getting dirt and smudges on it, so I will most likely need to hand wash it in the future. GemTac was the perfect glue as it is used for rhinestones and attaching gems to clothing. Good Stuff!

Chest emblem

I will be using a different cabochon than the one pictured. I have a turquoise oval stone that I will be using. The one in the pic is used as size reference.

I started on the cape, well. Pretty much done with it except for adding ties to the ends and buttons on the inside of the bodice to attach the ties. Basically it’s a large draped rectangle. . I made it from some very soft satin I found. Like pajama satin, not the stiff stuff. It drapes really nicely., even lined with the same fabric.

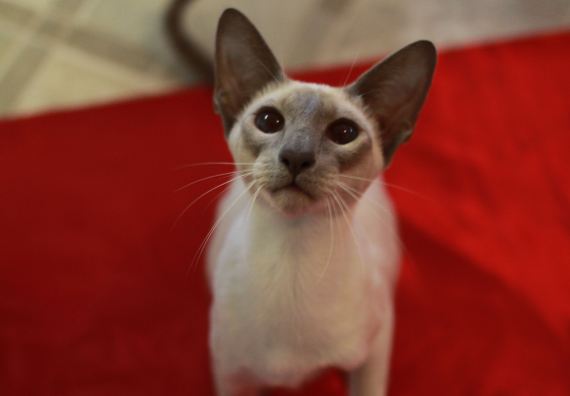
Here’s my Cat Lily “Helping” me cut my cape fabric.

Lily likes the Red Satin too.

Not much left to do, just odds and ends on the She-Ra Costume itself. I still need to make a Sword and shield and the decor for the boots.

Jane