18th Century Ladies 3/4 Size Tricorn Hat

For this coming Dragoncon in 2012, I will be Making a late 18th Dress with all the accessories ala Marie Antoinette inspired. The dress is from around the 1770’s and after looking at Headwear from the time, I decided on making a Ladies 3/4 Tricorn Hat, similiar to the ones worn in the Marie Antoinette film from 2006. The movie..not so great script wise…Fabulous eye candy when it came to costumes and set design.  I do know that Women did wear them in the Earlier part of the century but it was worn more like a Bicorn later down the line. Since my Entire ensemble is “Historically Inspired” rather than for a Re-enactment, I really want to have fun with it. I like the hat, so I’m making it!!

Here’s the Inspiration:

The Real Marie did wear this hat!

http://en.wikipedia.org/wiki/File:Marie_Antoinette_Young4.jpg

Here is Kristen Dunst from the Movie

Image

Some of the 3/4 Tricorns are meant to sit on top of the head on the hair-do, rather than fit snuggly on the head. Mainly to Not ruin their fancy hair. 

This particular Hat Style also came back in fashion during the Victorian Age, mainly as a Riding hat. I’ve seen a lot of the Steampunk ladies also use this particular style with their costumes. 

So I thought I would try my hand at making one of these rather than shelling out $150 up to $300 for one on Etsy. 

Materials List

  • 1 yard minimum of Heavy weight Buckram (Sold and Joann’s or Online)
  • Carpet Thread/Dual Duty Heavy weight Thread
  • 18 or 19 gauge Wire (I am used19 gauge wire from the Hardware Store, cheaper than Millinery wire. I got 50 feet of wire for $3.86 at True Value)
  • Wire Cutters
  • 3/4 of a Yard of Felt or Fleece 
  • Long Sharp Needle (s) that can go through many layers. A curved needle works best. 
  • Scissors (I suggest a old pair for cutting the buckram, it will ruin them for cutting fabric)
  • 1 to 2 yards of Your fashion fabric (You will need enough to cut some diagonal bias pieces at least 30 inches long). I suggest Lightweight fabrics for less Bulk. I’m using Taffeta. 
  • Pins…Tons of pins!!! You will bend some of them. quilting pins are stronger if you have them. 
  • Optional 3 M Adhesive, Tacky Glue 
  • Large pieces of paper for pattern making (Old Roll of Gift wrap works!!), Ruler, pencil
  • Any Trims, Baubles, Bows, Ribbon etc you want on the Hat
 
Step 1:
Make your Pattern
 
Figure out hows big you want to make your hat. You can make it bigger if you want a full size Tricorn. the Pattern and Basic instructions are pretty much the same. 
 
For the 3/4 Tricorn I made, I went with an Eliptical Crown shape.
 
THE CROWN:
I patterned an Ellipse that was 6 inches (15.4 cm)  x 6 1/2 inches (16.51 cm) for the top Crown piece.
I then Made a Strip 24 inches Long (60.96 cm) x 3 inches Wide (7.62 cm) This is the Bottom crown
 
THE BRIM:
You can make the brim whatever size you want. Sometimes Tricorn Fold over the crown. In this case, I only wanted the brim to flip to reach the top of the Crown, not over. Just add a few inches to make it bigger. Once you put the frame together you can decide later if you want to cut it down to a smaller size. In Hindsight, I should have made the brim a little bigger and next time I will. But this still gave me a nice look.  
 
I Drew an Ellipse 12 inches by 13 inches. I did not have a compass, so it’s not exact. I do suggest one!! Down below you can see my patterned pieces and my convoluted way of getting an elliptical shape without a compass. Hey, it works. 
 
The middle Hole should be about 5 Inches in Diameter. 


Image


STEP 2: Cut out your Buckram using your pattern pieces.

You won’t need seam allowance for these. Any subsequent Fabric will need at least a 1/2 inch seam allowance. Working with curves means you need more fabric than you think. Anytime you work on Curves..Cut on the bias…You will thank me later. basically 45 degree angled cuts. I’ll explain that later down the blog.  


Image

This is heavyweight Buckram. If you want an even stiffer hat I suggest ordering Double Buckram from a Millinery Supply House. For the small Hat we can just use the Regular strength. Hats are floppy until they are strengthened by wire and Fleece/Felt. 


Step 3: Sew your Crown pieces together.

Top flat piece to the 30 inch long strip. Cut off excess buckram and join the seams together. Now you should have a Pillbox Like the one below.. Did I mention I hate Hand sewing… I Mean Like REALLY Hate it! Thus the Uneven stitches..But it gets the job done and this puppy is not coming apart. Notice the hand sewing makes me a bit..Cross-eyed. Image
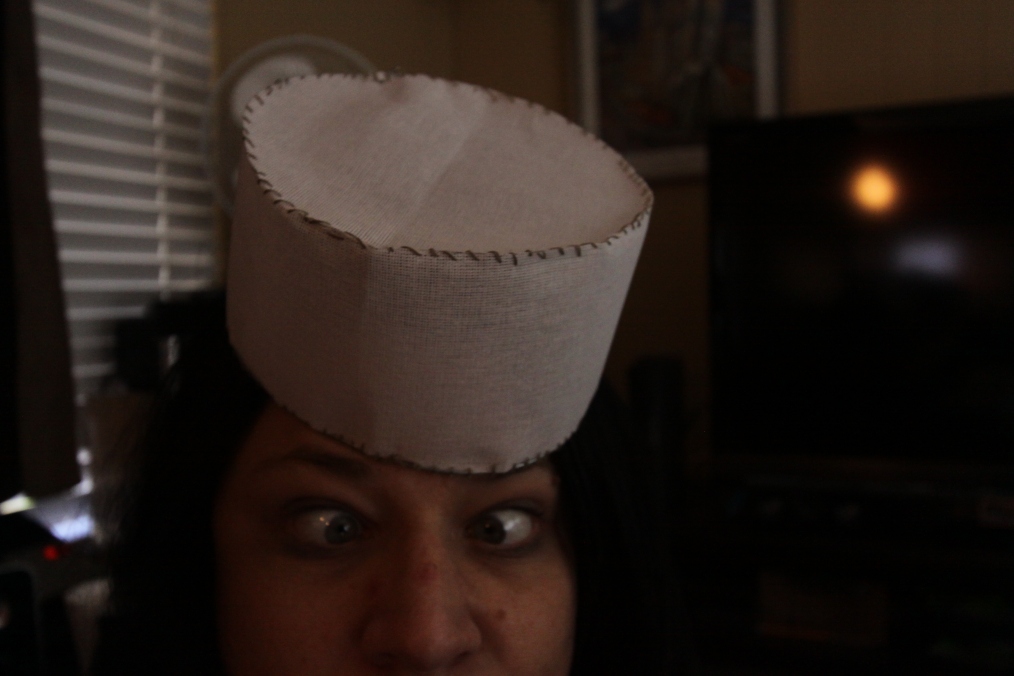
 

Step 4: Wire the Bottom Crown

Take a piece of wire slightly Longer than your crown. Sew it to the bottom of your “PillBox”. You want it to sit on top of the edge, not on the backside or front. I suggest using a blanket or buttonhole stitch to keep it on the edge. Similar to what I have done in the picture below. When you get to the two wires meeting you should slightly overlap them and tie down with a knot or do a little twist with a pair of pliers. It’s going to get covered with felt, so you don’t have to worry about wires poking you.

Image

Step 5: Attach the brim. 

Attaching the buckram brim will take a little fiddling to get it on. Whatever you do, don;t get all happy with your scissors and cut the brim hole too big. Cut the whole about an inch smaller in circumference from your crown top pattern about 5 inches in diameter, You will be making Cuts to make it fit. Clipping it on the curves. 

ImageThis is your flat brim piece with the hole marked and the initial Clips Drawn in. Carefully clip the hole until it fits snuggly over the crown


Like this!!

ImageIt’s all curly. But you can flatten the buckram out over night by putting something heavy on it. Typically they come rolled up thus causing the curls. In my case, It’s moot, because all my brim will tied to the crown.

Now sew your Brim onto the crown attaching at the Wire. 

Step 6: Add your Fleece/Felt. Cut your pieces exactly like your Buckram pattern EXCEPT Your Bottom Crown Piece. Cut this on the bias…Read below.

I’m using felt this time. I did not have fleece and even better for hats is Diaper Cloth if you can find it. You want to cushion and stiffen your hat up. This is where your hat will get it’s weight from.  

I do the inside of the crown first

Felt the inside brim, then the outside brim.

Then Felt your crown. Top piece first then this is where we get to the bias!!

What is the Bias?

Your bottom crown piece Should be cut on a 45 degree angle (The bias). this gives it extra Stretch in order to fit smoothly around the crown base. This is also why you cut your piece about 3 to 4 inches longer than you may think you need. The seam will be angled when you are done. You need the extra fabric to join the pieces. NOT Cutting on the bias will result in puckering sand frustration. 

Here’s a Tutorial on Bias Cutting

http://bagntell.wordpress.com/bias-cutting/


Image

Here’s how I attach the Felt Brim. Clipping to fit.


Image

My Cat Lily Inspecting the Inside Fleece. 


Image

OPTION: If you want to just place the Fleece on and not sew it you can use an adhesive. This will make it stiffer in the crown and Will make it harder to get a needle through. It’s not necessary but if you want it stiff and want it to stay, it’s an option. I use 3M Super 77. All purpose Adhesive. Decent stuff and works well on fabric.


So now you have your Fleece/Felt on. Sew it on/Tack it down good. You don’t have to sew it completely all the way around, just enough to keep it from wrinkling under your fashion fabric.

What your Hat should look like at this point.  Don’t mind the puckering in front, I had not tacked or trimmed it but wanting to give you a good idea. I machined stitched the fleece onto the brim. Make sure you use heavy duty needles!!

Image

Step 7: Fashion Fabric

Cut your fashion Fabric pieces with added seam allowance. I typically add 1/2 inch to 1 inch allowance, a little more for the brim. but one inch should be more than enough. 

Cutting Order is different than your original pattern:

1. Cut a 5 Inch BIAS Strip t least 28 -30 inches long. 28 is usually enough but it dependes on how much stretch is in your fabric. 

2. Cut a 2 inch BIAS Strip about 26 inches long

3. Cut a Square that is at least an inch or two bigger than the top of your crown

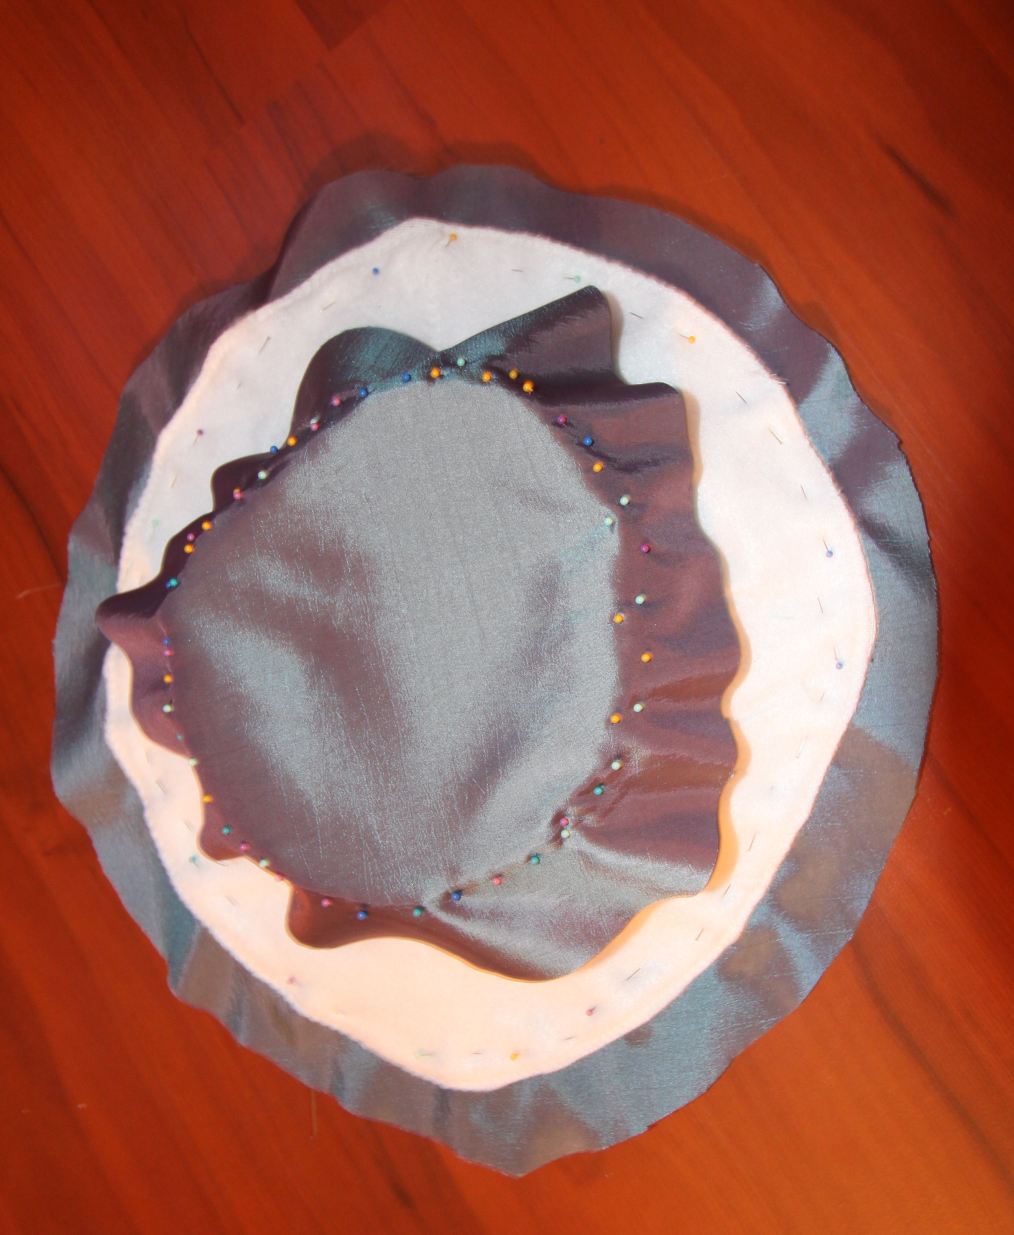
4. Cut 2 (Bottom and top of brim) circles Slighter bigger than your brim


Sew your Fabric to your brim joining the top and bottom brims seams. You can either do this by hand or machine. Remember you can cover seams with Trim to hide stitching. You will need to clip the inside just like the buckram.

Sew your square onto the Top Crown around the outer edge along the lower crown piece. You will cover this with your bias strip later on to hide the Stitches. Clip the excess fabric. Now put on your Bias strip. Folding the fabric at the bottom and top to make a clean edge. 

Image

YOU WILL NEED A TON OF PINS. Pin it to death!!!

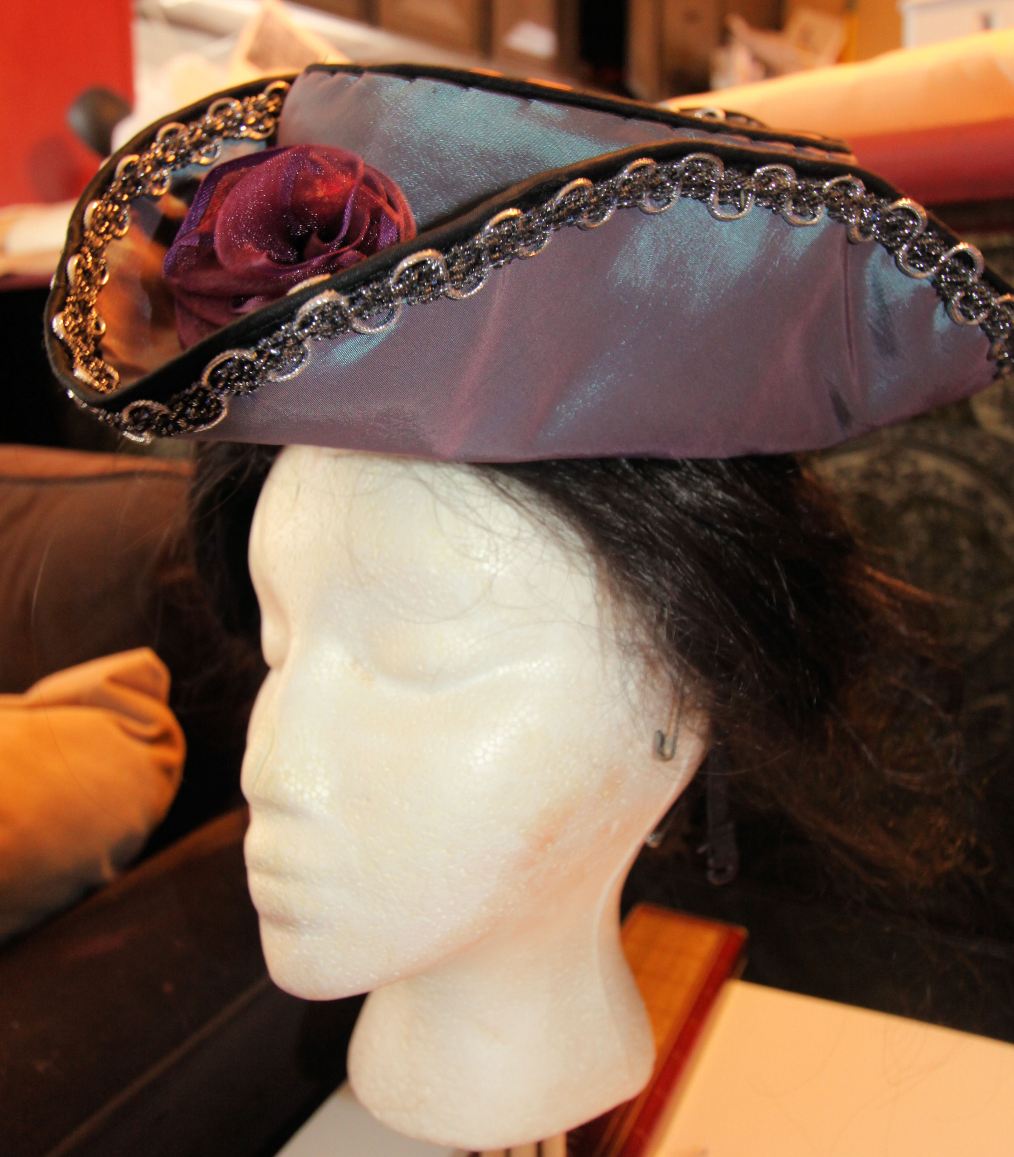
After you are done sewing everything down you can start adding trim. I added piping to the edges like this. It’s an extra step but it looks good! 

Image


After trimming out, add add band you can add all kinds of things to your hat feathers, pins etc. I only got the basic trimming done for the photo below. I plan to add a lot of decorative items, peacock feathers etc.

Image

Image

Costume Plans for the Next Year

It’s that time of year again. Dragoncon normally marks the beginning of a a new Costume Cycle. I hope to have 5 new costumes done this coming year. I would have made more last year but with renovating my house and moving,it just took a huge chunk out of my budget. This year I have several projects planned.

I started on a dazzler costume that needs to be finished. This will be done pretty soon and in my spare time. I don’t plan on wearing it until February but it can be knocked out pretty fast. I finished the mirrored roller skates and have all the other accessories. I’m holding off on making the actually jumpsuit for now. I started working with a professional trainer this week and I have started a hybrid diet that is mostly Chicken and vegetables with Protein shakes as a supplement. I’m trying to eat “Clean” food. Meaning no preservatives. It’s harder than most people think!! But anyhow, I’m getting in shape, lose a little weight, get healthy and hopefully a little buff for my 40th birthday next year. I was dreading this birthday but instead I’m going to embrace it the best I know how. Get in great shape and make a costume to show it off. So what is my Big Costume for next year?


Here you go!

I am doing some variant of Witchblade. Not just the Arm/Shoulders, the Whole Suit. It’s a daunting task. It involves a full body casting, Sculpting and working with several smooth-on products, mostly Silicone rubber. This is my major project for the next year. I will be doing other projects in between, but this one is my baby. I have wanted a full witchblade suit for so long and now I’m ready to tackle it. This will not be easy, I’m sure there will be lots of cursing and throwing things involved with this project. It is also expensive. My plan is to do it, do right and Make this my premier costume. I have seen very few suits done and quite frankly the two I have seen were ok but I feel I can do better. My OCD with costuming will actually be a asset to me on this one. This is not a quickie costume, we are talking time and money. I know it will be worth it to get a kickass costume!

My other projects will be a Hathor costume from the Stargate SG-1 Series. This is a costume to be used primarily for Group costume gatherings.

Goa'uld Ribbon Device


This will be a fun costume to make and I have already starting making a prototype of the Ribbon Hand Device.  I’m scouting out materials for the skirt and Bra top and will make the accessories using my jewelry making skills.

The other big costume I have is ..Samara from Mass Effect. I already have FemShep armor but Samara has been on my wishlist for sometime. With ME3 coming out, I hope to see some of the redesign on the suits she wears before deciding. For the meantime I will work on the Head Sculpt.

For those not familiar with Samara, she a sexy Asari. I’ve always wanted to be painted blue, so now is my chance!

I am involved in a New Group called N7 Elite.It is a costuming group for Mass Effect Cosplayers. Right now we are just on Facebook but a website is being worked on and we have a chat group as well. It’s great to be with other people who are passionate about Mass Effect cosplay! I’m the admin for the group and it just makes me so happy to see us finally come together.

I have one more costume but that will come later, it’s a secret project!


Namaste,

Jane

Alice Madness Returns Finished


Hello!! I’m back!

I managed to get the dress and accessories finished on the Royal Dress in time for Dragoncon! Since I got to Atlanta on Wednesday, I managed to finish up things in the Hotel room. Unfortunately I’m really not happy with the sculpt on the Skull. It also got smushed by the crowds at the con so I have decided to re sculpt it and this time Cast it in Thermoplastics.


Here are the final Pics!

Here is the back

Skull will need to be redone in thermoplastics.


I had a great time wearing the dress and ran into a few other Alice enthusiasts and costumers. I got a great response!! Which made me really happy. I was worried that it was such a small “niche” dress that no one would recognize it.  I wore it on Friday but had to change early to go to a group dinner. I wish I could have worn it one more time but I now feel like I can do some tweaking on it. I am going to add more stones to the bottom trim and redesign the belt and skull. This will be a dress that will stay on my Cosplay costume list for a few years.


I did managed to find one Pro Photographer who captured my dress that day. Thank you to Huey Bible!

Me walking in the Hilton Atlanta


Some of you may follow my Partner’s Blog and know that we also do Mass Effect Cosplay. I really like the next photo, Me as Alice , EvilFX (David Carpenter)  as Shepard.

We had a great time! Saw lots of old friends, made new ones and saw lots of great Cosplay. My next convention will be a small one in October called Nekocon. It’s mostly Anime but it’s starting to branch out to Video Game cosplay and pop culture. It’s local, so it’s worth a daytrip. I’ll either bring Alice or N7 Armor for the event. I will also be going to Orlando in February for Megacon. I got a great deal on direct flights and on a hotel within walking distance. Flying with armor is difficult, so I have decided to work on a more Travel-Friendly costume. I’ll write another blog on my future costume plans. Two of them are fairly ambitious projects with a 7-12 month plan involving body casting and sculpting. I also have two others which are primarily sewing projects. It’s going to be fun!!


Namaste!

Jane


Alice Madness Progress Update

Did a little more work on the dress this week. I should be finished soon. All that is left is details like rhinestones, trim, applique. I also started carving the basic shape out for the Catnip Cannon out of the expanding foam. The stuff is pretty easy to carve, but it’s pretty messy stuff. I’m finding foam flakes allover the house!


I need to take better pics of the dress. My camera is not cooperating, so it’s cell phone pics for now. when I’m done with everything, I will do a full photoshoot in the dress.


I was asked in an email where I got patterns from. To be honest, I make my own. the only thing I used a pattern on was the underskirt. It was a basic Simplicity pattern that I adapted. Look for a gathered skirt pattern. The bodice is just a basic bodice that I adapted. It’s not exact to the game but since in general, most women don’t have 15 inch waists like Alice it safe to presume that looking exactly like Alice in body form is impossible unless you are an anorexic! I am top heavy with a Hourglass figure, so I took that into account when I made the patterns for the bodice. It is tailored within an inch of it’s life. For me, the key that separates a good costume from a great costume is how well it fits and details. So these are the things I am focusing on.


I noticed in another blog that someone was referring to my build on here. Their complaint was the trim. Well, I’m not finished with it yet!! As for applique? It’s not hard to do at all.

You will need Steam-a-steam Bonding sheets or you can also use Heat and Bond Light. Do not get the heavy stuff if you plan on doing any stitching on it. My blog on Supergirl costume from last year has a tutorial on how to do basic applique. You don’t even have to know how to sew. My word of advice is that if you want a costume like this, learn to do it. It’s a handy skill to have when making costumes. It opens up a lot of opportunity for detail work that sets your costume apart. When I get back from Dragoncon, I will do some tutorials on Applique again, more detailed and step by step. I’m considering doing some how to videos for youtube if anyone is interested.

Until later!!

Madness Dress Update and Catnip cannon!!!

Did a little work this weekend. I have not been feeling too good (Back issues) and with the insanely hot weather lately, kind of lazy.

Dress is hemmed, now to add the handmade trim on the red outer skirt, apron is cut out and I decided to make the giant bow stiff, to use buckram as a base.


I started on the Catnip Cannon (Cheshire Cat Canon)

Here is what I it is based on:


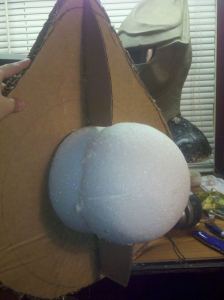
I started by taking some industrial Strength Cardboard I had around from when I was doing renovations in my house (My Bathtub was shipped in it). The stuff is very thick, about 1/2 an inch. It’s good stuff, difficult to cut. I ended up using a Linoleum Knife to cut it and even that was a struggle. But I needed something stable and able to handle the expanding foam. I used regular Cardboard for the stabilizing pieces. I used a Styrofoam ball cut in half, stacked and glued together as the base of the eyeball.


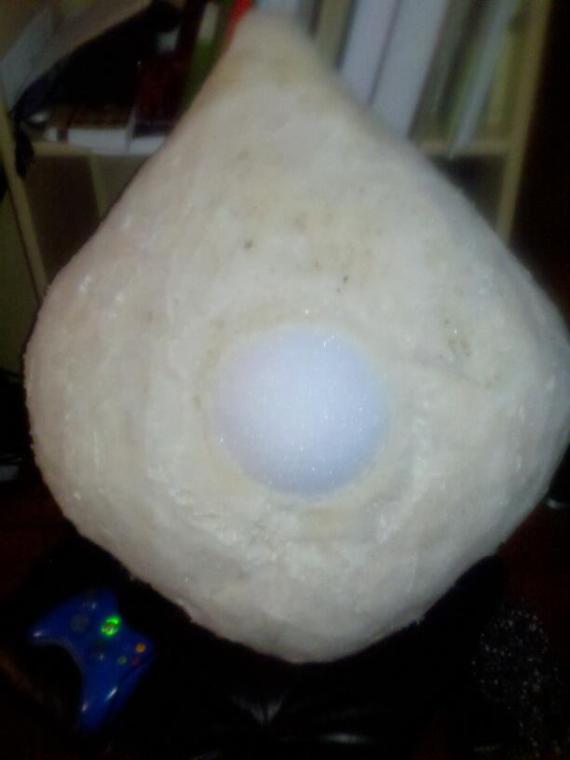
Next, I started layering on the Expanding Foam. This is foam in a can that you can buy at any hardware store. I started out with 3 extra-large cans and ran out fast. Always buy more than you think you will need. Also wear gloves, this stuff is like superglue if it dries on your hands. I had to use Lacquer thinner to get it off. It can also be messy at first, so make sure you spread some newspaper out. Keep in mind that it will expand after applying and to make sure you fill any spaces up before it starts to set. You can see in picture below after it expanded, it spilled over to cover the cardboard edges. this is a good thing. You want to retain the shape for carving but you also want to make less work for yourself. Do a little at a time and get used to how the foam sets. Some foam brands expand more than others. There is a variety of brands on the market.

I used Touch and Foam. It is triple expanding made for larger spaces that need filling.


This is what it looks like after expansion. When I applied it, it did not go over the edges at all. So play around with it first and see what it will do before just spraying the whole thing.

Once the Foam has completely dried inside (about 8 hours needed, the outside sets up in less than 30 minutes but it’s gooey inside), then you can begin carving, I am using a utility knife for most the carving. this is all experimental for me. I’ve not done this before, so I hope it turns out.

After carving, I will go back and fill in the holes with more expanding foam using a putty knife. After it is dry, I will cover with Painters tape and then using a wallpaper adhesive will apply a layer of paper mache, then polymer coating to smooth it out. All the attachments like the spout, handle and feet with be made using EVA Foam and maybe molds and hot glue technique that Evil Uses for his Guyver suits.


Alice Madness Royal Dress- Skirts


I finished all the hand sewing on the bodice and Got the over skirt attached. I’m really not happy with the over skirt pleating and will likely rip it out tonight and start over. This dress has very weird construction. In order to get the look in the game, I cannot completely attach the over skirt in front, which means the underskirt is now going to have to be attached to the dress rather than a stand alone underskirt. the Waistband/Bow will basically hold everything together.

I also shortened the sleeves to be more Game Correct and will have to add the sleeve bands back. They have appliqued tiny hearts on them, So I will do them separately and then reattach them.

Sorry if the hearts look lopsided, My dress form is a bit warped and lopsided, not the bodice.

I now have to make handmade trim for the skirt, the Giant Bow in the back and start working on the Skull Sculpture that is attached to the bow in the back.

Royal Dress Update-Bodice Work

I worked on the Bodice last night which is far the most important and most labor intensive of the whole dress. Finding the right fabric for the appliqued hearts was hard at first but I scored a remnant piece in the clearance bin at Joann’s 1 1/4 yards for $4. It was $14 a yard, so score! In the game the hearts definitely look like they are glistening, maybe beads or crystals. the fabric I found was a semi-opaque mirrored material. It was also light gold. I debated whether the Hearts were Gold or Pink but settled on Gold as pink seemed out of place but I think there are pink crystals on the dress in some places.And will add some here and there if I have time.


Bodice needssome adjustment and still a little more tweaking before putting on the skirt.

I need to shorten the sleeves by about an inch and will work on that tomorrow afternoon. They need to be shorter in order to show off the arm warmers properly. Right now, I have the trim pinned and it’s ready for  . I prefer handsewing as I think it will look better but I may end up machine sewing some of it. I also have picked up a new textile glue by Alene’s. Same company that makes Tacky glue. I may end up using it for the trim in some places.I did a test piece and it held very well, No puckering or lumps. I think it’s a great product. Better than any fabric glue I have used before though I still live and breathe by E 6000. That’s the glue I always go to when I need to get something to stick. The only thing about the Alene’s is that it smells like airplane glue, pretty toxic. I guess if I was a huffer (lol), I might like it better. But I’ll stick with E6000 for most of my costume making.  I’ve been through tons of tubes of the stuff, it’s never failed me.

Next I will be adding the outer skirt and work on the bow in the back, the skull sculpture on the back and the apron. I plan on making her Omega necklace out of Sculpey.


Alice Madness Returns Royal Dress Part 3

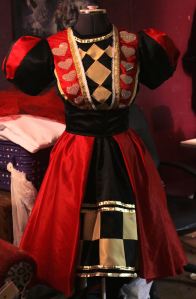
I spent last night working on the Checkerboard and gold trim on the underdress. I like the way it turned out. I have to make a fabric store run tonight to get more supplies for the applique designs and some shiny Bits and pearls for the trim.

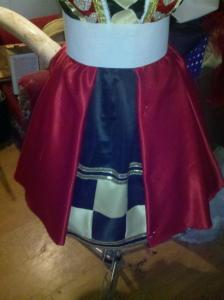
Here’s the underskirt:

Underdress for Royal Dress

Because I have very little Photos to go by online, I have had to go in and out of the game to make notes and sketches. One of the things that I have to decide on is pleats in the skirt. It really does not appear to have any. After doing some thinking and a little research, I’ve decided that a circle skirt style dress would be more befitting of the Original Alice Time Period, The Edwardian age. It will give the fullness at the bottom that I need but still leave a slimmer silhouette . the only bad thing is I will need about 2 more yards of fabric to do this. So I have to make a Run to Joann’s. I hope they have enough left!

Another thing that is puzzling me is some of the colors, Mainly the hearts  on the bodice. they look white sometimes and other times look pink. It’s really hard to tell. They even look gold at times!! So have decisions to make in regards  to the color. I’ll be picking up some crystals and beads tonight. I’m sure it will take me forever to make a decision. Believe me you don’t want to go bead shopping with me. It’s an excursion!

Alice: Madness Returns Royal Dress Part 2

I have always been a Fan of American McGee’s Version of Alice in Wonderland. Dark, Bloody and twisted. Right up my Alley. I know that some people may not be familiar with the Graphic Novels or the two Video games, as it is a bit of a niche fanbase. Basically Alice is now an adult who was living in an asylum, she lost her parents in a horrible fire and is now living in a home which houses the disturbed patients of a London Shrink. She goes back to Wonderland finding it a pretty twisted place. The graphics in the game range from very colorful to very dark and bloody. But the best thing about the game is that Alice has tons of costumes and props! Most know the Traditional Blue dress (In American McGee’s comic she bloodstained and carrying a Vorpal blade). In the New game, I have chosen to work on the Royal Dress which you unlock when going to see the Queen of hearts. I also plan on making a Hobby horse prop which is used like a giant sledgehammer in the game.

Royal Dress

Here are the main 4 hobby horses

The dress bodice is pretty much a custom pattern. It’s lots of princess seams and tailoring. I plan on doing applique for the diamonds and hearts and adding Crystals and beads. In the Game play, you can get a better 360 degree view.

For Fabric I am going with Bridal Weight Satins in black and red. The Giant bow in the back will be made of Black Moire Fabric to simulate the texture seen in the game. A lot of handsewing on this dress, tons of trim, some lace and small beads will be used to trim it out.

I already own a pair of Demonia boots and will be adding buckles and fake straps. The boots are hard to find in this particular style, so I plan on making the buckles from EVa Foam and Painting them.

the arm sleeves will be made from spandex and the pattern appliqued on (More handsewing!).

So far I have the main bodice, the “Snow White” Style Sleeves finished and the underskirt 90% done except hemming which I will do after I make the checkerboard trim.

Firstly, let me apologize for the crappy photos. I moved 4 weeks ago and I am still looking for my Camera Cord!!!!

Here is the bodice, sleeves and underskirt, Still lots of trim and applique to add:

Sleeve detail. Done just like a snow white dress.

Here’s the the Tentative Applique Patterns which will be made from gold fabric and trimmed out with crystals on the hearts and some gold beads around the diamond patterns.

that’s all I have done so far. It’s a lot of work. I suspect I’ll be doing lots of handsewing every night!

Jane

Alice: Madness Returns

No, I’m still working on Baroness. I moved recently and half my stuff is in storage, so While I get my workshop straight and stuff moved in, I am working on a Prop for Alice: Madness Returns Video Game. It is based on American McGee’s Alice. For those not familiar, It’s basically a very dark gothic version of Alice in Wonderland. Alice is an Adult and is living in an Asylum. The books are very imaginative. I’ve been playing the new video game for the past few days and This costume is calling out to me. The dress itself is the easy part. But in order to take this costume to a different level I feel I need a Prop. a well made one at that. So I am undertaking a project of firsts. My first time building anything made of Styrofoam and fiberglass. Getting guidance from fellow costume and propmakers, I feel I have gathered the right materials and I am ready to go.

Reference pics are the most important here. they are difficult to find. I’ve had to go into the game constantly for reference. There are 5 weapons in the game. But I have decided on …The Hobby Horse Hammer. The upgrade in the game turns it into a unicorn. Hey,  Who doesn’t like Unicorns that kill people ? Now, getting horse heads right can be difficult.  As a painter, I’ve painted horses. They are not easy to render correctly. Getting the Shape of the head right can be difficult and always proposed a challenge.  But since this is a hobby horse, I have a lot more leway when it comes to proportion. This is otherwordly, it a toy gone wrong!

Here is some reference pics:

the Red One:

the one I am leaning toward is the unicorn.

Here is a Picture of the shape

These are the best Images I can find. You have to go into the game for a better 360 degree view.

Materials:

Polystyrene Foam Insulation Sheets (Blue ones from Lowes Made by Dow, Home Depot sells Pink, same stuff)

Drywall Knife for basic cutting

Coping saw

Hot Knife

Utility knife

Rasp

Various Grit Sandpapers

Parks Super Glaze (To seal Foam)

Bondo (Original and Bondo Glass)

Water Based Primer (Kilz)

Acrylic Paints

7-6 ft, Large diameter Wood Pole

Option: Battery Power Lighting for eyes, mouth and Unicorn horn) If I have time!

1 Chain, A fake one will cut down on weight but I may just use whatever I can find at the hardware store