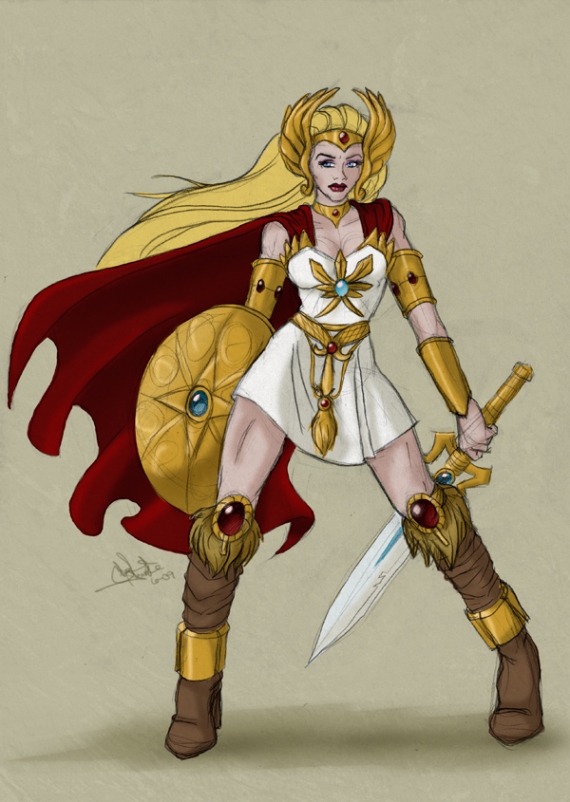
Archive for July, 2010

She-Ra Blog Part 5

Finished the hem on the dress. I ended up taking about 3 more inches off. And doing two separate hems. One for the lining and for the dress. It gives a smooth line and makes it easier to do repairs if needed. The lining hem is slightly shorter than the dress and I tacked it in about 3 places to keep it from riding up.

I finished the chest piece decoration and the wing-like decoration on one side. I used some red vinyl that I had for the molotov costume and put about 5 layers of craft paint on it. The upper wing-like decor has a fun foam backing to make it stiff and stand up. the chest piece has buckram glued to the back to give the glue something to hold onto. I do need to touch-up the paint a bit on it, but otherwise done.

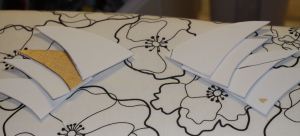
To make the pattern for the chest. I pretty much freehand it on this one. I could not find a direct on pic of the chest piece. It seems all the screen captures have her at an angle. So using several reference pics. I just freehand made the pieces until they looked about right and sized them to the front of the bodice. I just reversed them for the other side.

Pattern Cutouts

 I then traced the patterns onto the painted vinyl. Repainted over any leftover pen marks.

I used a Glue called GemTac to adhere the buckram to the back and to adhere the pieces to front of the bodice. Stacked some heavy books on it and then let it dry. It does not not take long for GemTac to set up, dries clear and after 24 hours can get wet. Since the dress is white, I anticipate getting dirt and smudges on it, so I will most likely need to hand wash it in the future. GemTac was the perfect glue as it is used for rhinestones and attaching gems to clothing. Good Stuff!

Chest emblem

I will be using a different cabochon than the one pictured. I have a turquoise oval stone that I will be using. The one in the pic is used as size reference.

I started on the cape, well. Pretty much done with it except for adding ties to the ends and buttons on the inside of the bodice to attach the ties. Basically it’s a large draped rectangle. . I made it from some very soft satin I found. Like pajama satin, not the stiff stuff. It drapes really nicely., even lined with the same fabric.

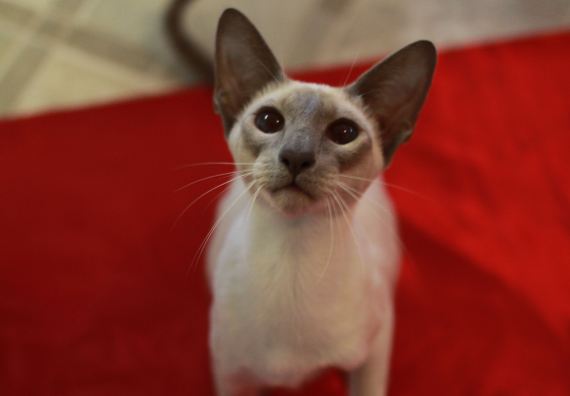
Here’s my Cat Lily “Helping” me cut my cape fabric.

Lily likes the Red Satin too.

Not much left to do, just odds and ends on the She-Ra Costume itself. I still need to make a Sword and shield and the decor for the boots.

Jane

She-Ra Update/Molotov Costume


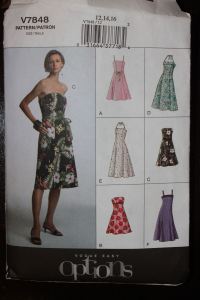
I finally solved some sewing issues I had. I have not sewn anything since my body has changed,so I had a bit of trial with fitting the bodice for the simplicity pattern. I spent hours working on it and still could not get it to sit flat like I needed. So I decided to completely re-do the dress using Vogue Pattern V7848. It’s an A-line dress pattern that came with many options including strapless. So much better!! No bitching and fighting with the new pattern. The bust ease is huge though. According to the size chart (I wear a Misses size 4/6 in Off the rack), It says that my bust is 12 and my waist/hips are a 8/10. Hmmmm…Still had to do some altering anf after reading other people’s experience with this pattern, I was told that the bust ease is at least off by 2 inches. I cut the 12 and widdled it down about 2 inches in the bust and almost three in the waist. In hindsight I should have cut the 10. For those not experienced with commercial patterns. They do not use your real world off the rack clothing size. They o by body measurements starting at size 6. So 6 is like and Xtra-Xtra Small.  Patterns are also made for B Cup sized women. I guess they consider it average. Personally most women I know are over C cups. Me…eh…DDD/E. Can you see where my issue is now? If it fits in the bust, the waist is always huge. With the exception of Spandex and stretchy clothes, I have to tailor everything. Button up blouses? Forget-a-bout-it! Can’t wear them unless I make them. 

So I worked the new Voque pattern out. View C. Very pleased. Even the altering was super easy on this one. It’s rated for a “Easy” sew. Personally, beginner folks can do this but the boning might give some people issues if they have never put any on a garment. 

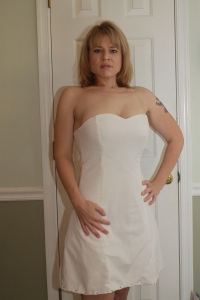
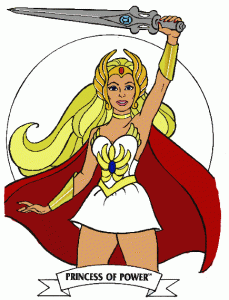
I altered the pattern in the bust, waist and plan to make it much shorter (Have not hemmed yet). I decided because the fabric was quite see-thru, to completely line it with the same fabric. I just barely had enough. I also changed the front bodice line from straight to a more sweetheart bustline in order to get the same silhouette as She-Ra in the cartoon. 

Dress pattern, I used View C

Here’s a pic before hemming (I need to iron too, so forgive the wrinkles) 


I will finish the hemming tonight (by hand..ugh) 

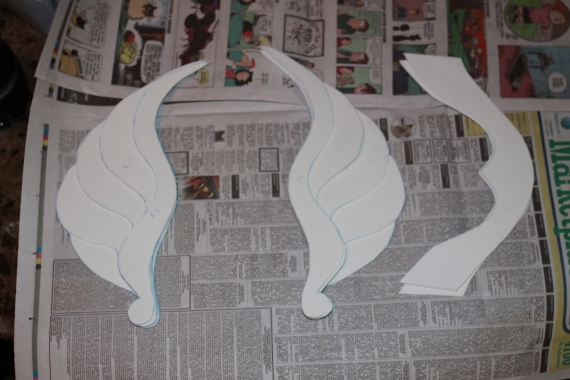
I also cut out the bodice top decorations. And made all the patterns for the front dress emblem to cut out later. 

Fun Foam cutout for the bodice top

The front of her gown looks like this… 


I will do the belting more like the original reference pic I posted in my first blog. I think it adds more character and interest. 

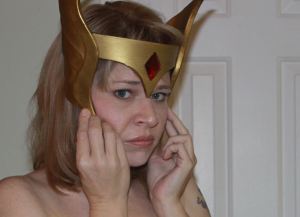
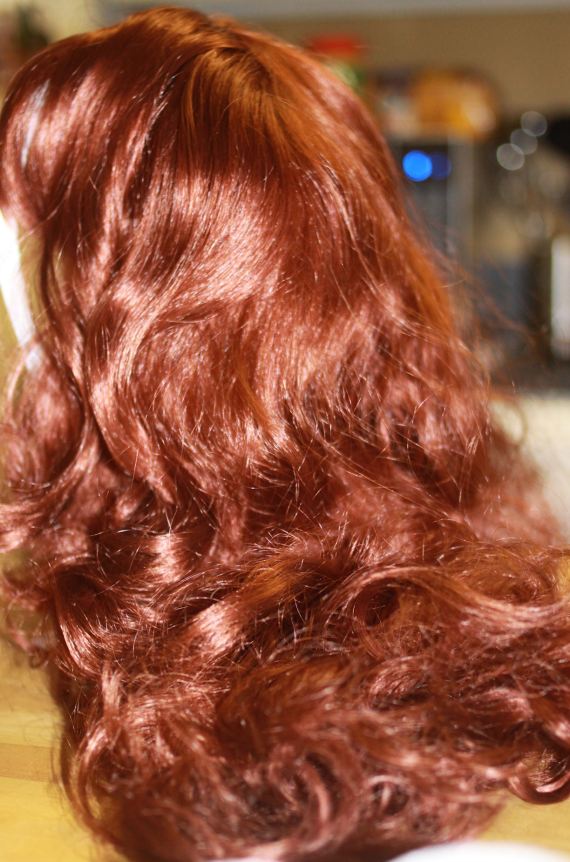
I need to go retrieve my Wig from David’s, so I can adjust the headdress. But here it is. 

Why do I look so Glum? Oh Yeah, the cat threw up...lol

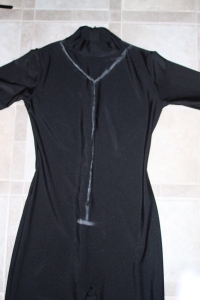
As for my other costume, Molotov. I got the unitard. It’s a Bal Togs, good quality. I traced an opening, cut out the mock neck and cut away at the fabric until I got the right shape. I them finished the edges with a roll hem…easy peasy. Next the engineering comes with using clear straps and double-sided tape. For final fitting I’ll have pics. 

Unitard cutting lines

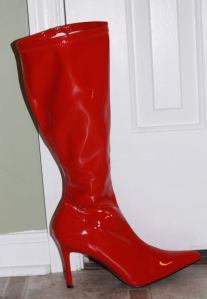
 I also got my red sexy boots for the character. Heck, I’ll wear them out. they are actually comfy! 

Boots for Molotov

I finished the eye patch and the Hip belt (No pics yet). Still working on turning vinyl strips into a gun belt and holster. I ran out of E6000 Glue which is the only thing that seems to work on holding the vinyl together. So another trip to Wal-Mart is in order. 

Jane

Update on Costumes

I’m sorry I have not updated. I’m having some health issues right now. And when I feel bad, I can’t work on much because I end up screwing it up.  That being said, I did cut out the bodice for the dress. It was not working at all. Being the body type that I am (Hourglass figure), my guess is most commercial patterns are just not made for me and my upper body structure. I did about 3 modifications and it still was not working , so I’m back to square one. After looking at several She-Ra photos (both costume and cartoon/Drawings), I’ve decided that her upper body area is definitely armor-like. This will solve some of my issues with getting the correct shape. As someone who has made many a corset over my lifetime, I can’t figure out why the pattern was not working until I realized that the measurements of the pattern were not the measurements listed on the back. They are off by about 1 1/2 inches! Just to be sure, I measured about 4 times to make sure I was not doing something wrong. I have only had this happen once before and that was a McCalls pattern years ago. I believe that one gave everyone problems on the Great Pattern Review. So I am using my creativity here and doing something totally different. I am taking the longline bra (with molded cups) and I am going to cover it like I would a belleydance bra. It’s a little trickier with a longline and I will still need to sew the seamed pieces together. But I really want that molded armor look. I will be making some armor pieces to run slanted across the breast and chest and then adhering the Gold Symbols onto that. That way I can remove them if I ever decide I need the bra for something else. I’m hoping this works. And I hope I feel better soon. I have too much to do before dragoncon.

Poison Ivy, I have decided may get shelved for the time being unless I can get everything else finished in time.

Today my Unitard for the Molotov Costume Came in. This one is actually not going to take too much time. I have the boots, red vinyl to cover all the Belting and to make the gun holster and knife holster. I ordered a red wig that I think is perfect . For those who don’t know who Molotov is, She is Molotov Cocktease (yes…I know..lol). She’s a character on the Venture Brothers cartoon on Adult Swim. I totally love that show and went back and caught a few I have missed while being under the weather.

Here’s a pic of the character:

She’s a cool character. A tease and you have to be pretty ballsy to wear an outfit like this. It’s why I’ve been doing my stomach crunches!. I definitely got the cleavage for it. The suit will be a bit of an engineering process. I have clear strapping made for bras that I will attach under the breast to keep any wardrobe malfunctioning from happening.  weaponry may be a problem, so I’m going to have to come up with something. I have 2 airsoft glock 17’s but I doubt they will let me into the Hyatt Hotel with them. I think I still have a fake knife leftover from Halloween but I would love to make a sword to go with this one!

So She-Ra is getting done. I’ll update in a few days and hopefully the dress will be done. I finished the skirt part and everything else is complete except the bodice, so I’m happy about that.

Jane

She-Ra Day 3

Spent most of the day thrift shopping for belts and boots. I found a pair of boots for 5 bucks at the Goodwill. Leather with a stretchy back. Very comfy. I considered going with a stiletto heel like she wore in the cartoon series. But for practicality’s sake and for walking around DragonCon, the lower heel and well broken in shoes seemed like a much better choice. Plus if I screwed up the paint job, No big loss financially.

After testing gold paint last night on the inside of the boot. I decided to go with 14Kt Spray. I found this in the Floral section of Joann’s. It’s one of the nicer metallic paints that I have found in a spray can. One of the concerns with spraying shoes/Boots is cracking and flaking. It’s gonna happen sooner or later. So I’m sure it will need a touch up down the line. One thing I have learned about spray paints, they are not all equal. The 14Kt spray is a higher end paint, adheres to just about anything and has more flexibility than say Krylon paints. I’m not knocking Krylon, I use it all the time but the 14KT is great for treating clothing items.  It’s meant for floral use, so thus the more flexibility part comes into play.

Here’s the Boots with two coats. I’m still going to treat these afterward to tone down the Gold a bit to match the rest of the gold pieces. It’s pretty close!

Gold painted boots with 14Kt paint

I’m going to add the Red Cabochons and trim later. I’m going to have to cast Large Red Cabochons in Resin because I cannot find anything in the stores equal in size or color.  I know in the pictures of she-Ra from her 90’s update,  her boots are brown, but for times sake and to save my wallet, gold is a better choice.

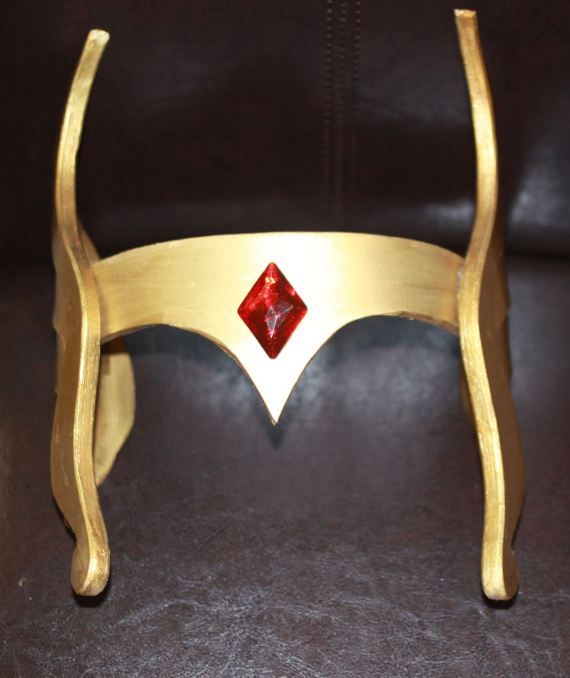
Other than attaching the elastic (which will not be seen under the hair/Wig), the Headpiece is pretty much finished. I made this piece more to scale of the cartoon style. You will see a lot of interpretation on the head piece. I have the Anniversary She-Ra figure from Comic-Con and I can tell you her headpiece is Huge!!! Kinda looks silly in real life. So I’m sticking with something more traditional to the TV Show. I tell you some of the ones of seen online are either way too big or too small. I fall somewhere in between.

Headpiece front

She-Ra Head piece Side view

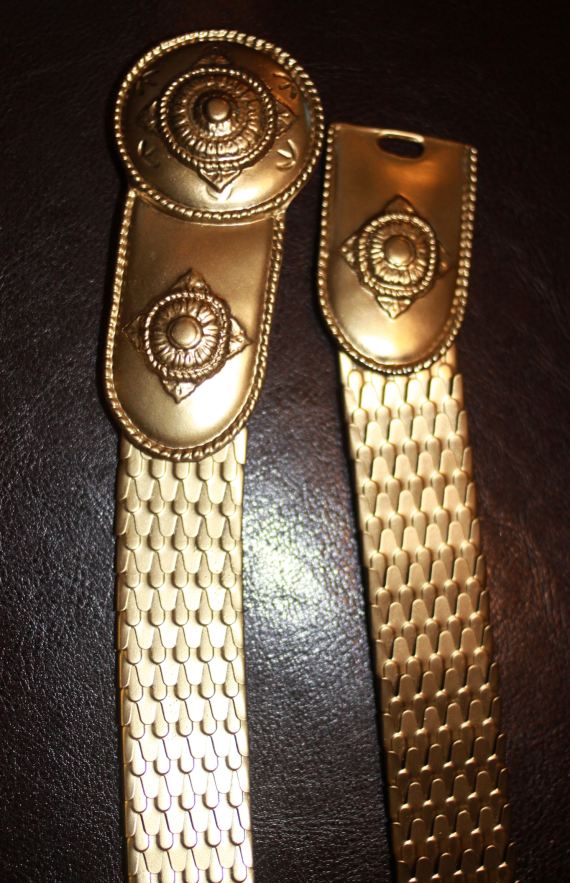
While thrift Shopping with Evil-Fx, I found this silver stretchy metal belt with a  cool buckle. I think the shape and decor keep in the theme and plan to use this for the top portion of the belt. I used the 14KT Gold spray (works on metal surfaces). Just a light spraying was more than enough. I think it’s pretty cool even if I don’t end up using it. Beside it was a $1.98 for a metal belt. Can’t beat that.

Thrift Store Find Painted Gold

I finished the collar piece, though I’m not real happy with it. If I have time, I will make another minus the puff paint. I’m not fond of that stuff at all.

She-Ra Collar

So now I’m starting on the dress. My longline bra should be here tomorrow and I can start basting and fitting. According to the size chart on the back, I’m going to have to do some major alterations to get a good fit.

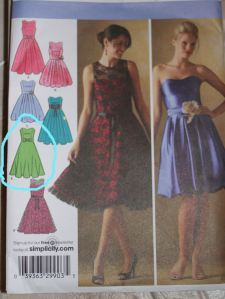
Simplicity pattern 4070 View D. It has straight lines rather and gathered skirt. I think it’s more flattering on my body type.  Of course, I will omit the ribbon and bow and shorten the skirt.

Using View D Simplicity 4070

Well, off to work!

Jane

She-Ra Day 2

Well I finished the headpieces. It took about 2 layers of sealer (glue), 3 layers of craft paint and then
I buffed in some liquitex Burnt Umber Acrylic paint to give it more depth. Then used a bit of the rub and buff and then 2 coats of Liquitex Glossy varnish. I’m pretty pleased with the way they came out

Here’s a before and after the “antique” paint job. The left is just plain cheap craft paint in gold. the Right is the treated one.

She-ra Wings before and after

 Here’s the finished pieces.

Finished Wings

I cut out most of the foam pieces for the neck, upper arms, the chest. They still need to be sanded, painted and so on. I also cut out the dress for fitting. I will post those in the next few days as I finish each piece.

Jane

She-Ra Costume

She-Ra

While I am waiting for some material to arrive to finish my poison Ivy Costume, I thought I would keep myself busy with my She-Ra costume. I’ve always wanted to be She-Ra. She was my favorite cartoon character from the 80’s. I guess it was that female power thing that caught my attention when I was younger. Anyhow, I have just about everything I need for this costume except for the longline bra that I ordered. I cannot find anything to fit me in the regular stores because they very rarely carry my size and when they do, it’s very expensive. So I started on the “Gold” pieces of the costume. The headdress, the arm bracers, the collar first. All made from various thicknesses of Fun Foam or somtimes known as “Foamies”. You can find them in any craft/Fabric store pretty cheap. Sheets run anywhere from 50 cents to a dollar depending on how big it is or it’s thickness. I’m using two thicknesses for the costume. One is the very thin stuff, layered to created the headpiece wig portion. The other is 1/8 inch soft EVA foam. This is being heat molded using a heat gun for the arm bracers and neck collar.

The arm bracers are pretty much done except for putting on the velcro straps. I used an existing pattern that My boyfriend made for the N7 Mass Effect armor. I cut it, had him sand it with the dremel to give it clean lines and then I used a 50/50 mix of Elmers fabric and Craft glue to seal the foam.

Heres’ the bracers after heat forming and coating with three coats of my glue primer
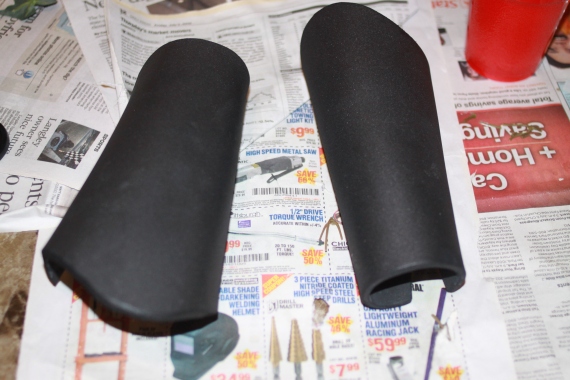
Bracers Formed, sanded, primed, ready to paint

 If you do not seal it, the paint will soak in and you could be painting it forever and not get a solid paint job. 2-3 coats of the 50/50 mix. Let it dry thoroughly. Takes a few hours. Then I painted it with Creamcoat craft paint in Gold. I could not find the more antique gold that I wanted but I found a good solution that actually gave me the result I wanted. After 3 coats of paint, let dry completely. I let mine sit overnight, did touch ups in the morning and they were ready for the final applications by the evening. I decided to use a tube of Rub n buff from the craft store. Typically it’s used on raised areas to give an antique look. But what I wanted was a more metal look., simulating gold. I used a tiny bit and rubbed in with my fingers and then buffed with a towel. The result is nice and metallic and it toned down the more yellow look of the paint which to me looked too fake. After the rub and buff, I put a light layer of Varnish on it and let it dry. One area on one of the bracers got a bit messed up from sitting outside drying (varnish stinks). So I may have to go back over that area. But overall I am pleased with the way they came out.

Glue Primer I used is Elmer’s Fabric and craft glue.
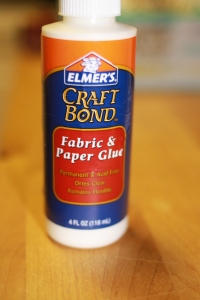
Craft Glue used for paint primer on foam 50/50 Ratio water to Glue

After painting with the cream coat, I used Rub’n’buff.  Found in most craft stores where they keep the gold leafing supplies.
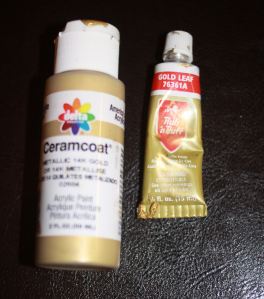
Paint and Rub n buff .

 Here is the finished bracer. Pretty simple, no embellishments. 3 layers of paint, rub’n buff and a coat of varnish. Need to add the velcro straps.
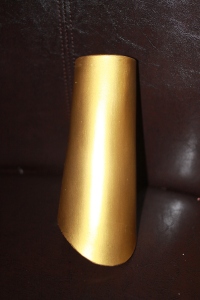
Finished Arm Bracer for She-Ra

The headpiece is cut out, glued with E6000 glue. that stuff will bond to anything. David sanded them down for me and now they are ready to shape and paint. all the other foam pieces are cut out and awaiting for me to finish. I picked up some plastic jewels today for embellishment on the metal pieces and the dress.

 Here’s the cut out and glues headform. After sanding and painting I’ll attach it to the headband.
The dress pattern is based off of a simplicity special occasion dress which I believe is now out of print. I will need to alter it a bit. I normally wear a size 6/8 in the bewb area but a 4 everywhere else. The dress has Princess lines that are easy to adjust and are flattering to the figure, so no big deal. I got some bridal type satin (matte, not super shiny) for the dress. It was on the remnant table, so I lucked out in getting a 10 dollar a yard fabric for 3 dollars a yard…bargain for nice thick bridal satin! Still looking for nice flowy cape material that doesn’t look cheesy but doesn’t cost a fortune. Joann’s did not have what I was looking for, so I will make a trip to Hancock Fabrics this week to see what they have.

The Boots are gonna be the tough part. I could paint some pleather boots that I have but I really like the boots for winter and painting them would ruin them and make them unwearable most of the time. So I’m either hunting for Gold Boots or I could do the She-Ra late 90’s version of the suede boots with the embellishments on top. That would require more work, but I think they may be more comfy for wearing at conventions all day. Wig…already got a nice one that will work.  The only bad thing about wearing costumes is…no pockets!! where do I put my stuff!!

More updates later on all my costumes. I am also working on a Venture Bros costume….guess which one?

Jane

Poison Ivy Day 2

I have the corset almost complete. I ran out of hot glue, soI have just a bit of the back to finish. The top will be finished last with fall color leaves.


Here’s the full front of the corset

Full front almost complete

 While I wait to go get more glue and some other things I need at Walmart. Here’s my ideas for the wig and hairpieces.

Syr

Poison Ivy Wig Choice

 Here’s the Styrofoam I cut to make the Buns. When I was doing theatrical costuming we used to use forms to make buns and historical hairstyles. You always wonder how people had so much hair back then but the truth is they used them too!

Hair Decor

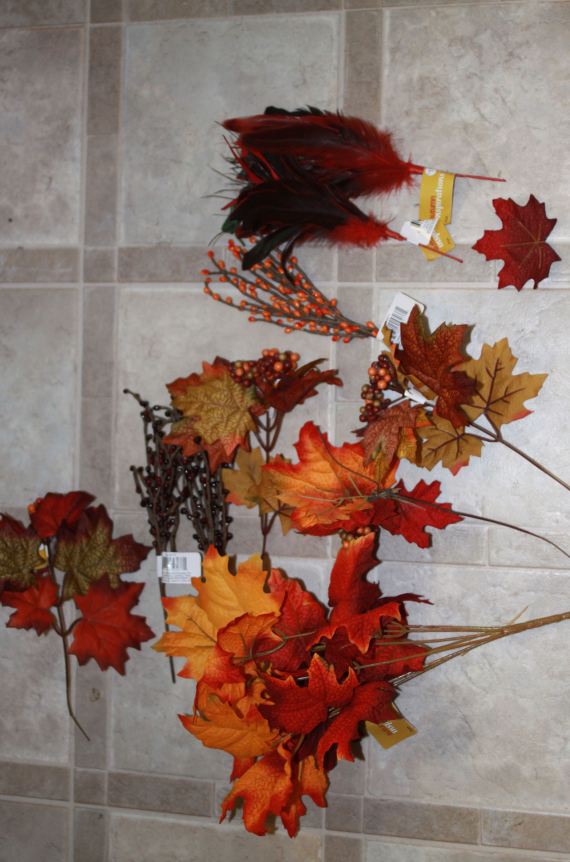
 After forming the hair, I will decorate with leaves and various fall themed “Stuff”.

Still working on ideas for the boots. Thinking about painting a pair green and decorating with leaves. I’m headed to the thrift stores tomorrow to see what I can find.

Gauntlet style gloves and cape will follow after the hair and boots are done. Still debating about green hose, regular dance tights or a combo of flesh tights with ivy painted on them. I don’t want overkill on the foliage.

So far this has been a fun costume project and I can wait to get dressed up for a photo shoot in it. The makeup will be fun too!

Namaste!

Jane
Poison Ivy Costume Blog 1

Costume Idea

Since I will be attending DragonCon this labor day, I have started on some costumes. First one is Poison Ivy. She’s a great character because she’s a bit of a non-conformist. Many incarnations of her character are available. I’m doing a cross between a traditional comic style and Uma Thurman’s version from the film.

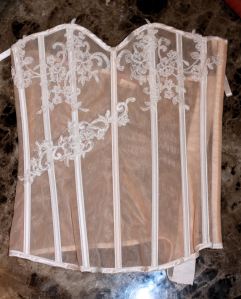
After debating about materials, I decided to use a Lightly boned bustier/Basque that I found about a year ago that has been sitting in my drawer. It’s nude colored but of a mesh material, so it breathes somewhat. I will be covering it in two different types of fake Ivy for a more 3 dimensional look. Alternating rows of the two different types. I am using hot glue to attach it. Hot glue will make it almost armor like in feel but the boning in it will help keep it’s hourglass shape and hold the bewbs up. I have a lycra swimsuit bottom which I will also cover with ivy or I will make a green spandex panty to match, I have not decided yet. I still have to decide if I want to do green colored hose or skintoned. For the feet, I’m looking for green boots but not having much success. Everything I find is way too expensive. I may have to paint a pair I already have or go with shoes instead. I will also be making a cape. Most likely velveteen with a cinnamon red or rust colored lining. The hair is going to be the creative and fun part. I already have a auburn curly wig that is perfect. It needs some altering and I will be adding some sculptural feeling to it by adding some small buns and leaves, berries and maybe some small feather. I want it to be original looking. For the face and makeup, still sketching that out but I like the idea of adhering some leaves around my eye area or making a latex leaf mask. If I do fake leaves, I’ll have to spirit gum it to my forehead. Not fond of the stuff but we shall see.

I have the corset about 1/4 finished before severely burning my fingers on the hot glue. I’m going to have to use some tweezers and popsicles sticks to keep that from happening again. MY right ring finger is a mess. Lesson learned! Hot glue and skin don’t mix!!!

Raw bustier to be covered in Ivy

Here’s the bustier I found to cover. It will give me a nice womanly shape rather than some of the blob like shapesyou see in some of the “suit” costumes.

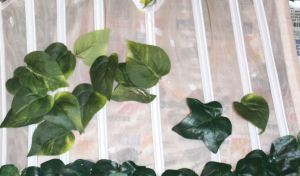
Ivy choices for costume


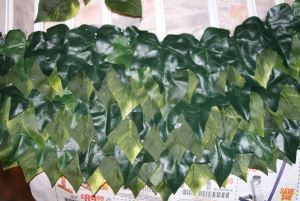
I decided on two types of Ivy to give the costume a more 3D effect and give it some texture and interest. I am alternating rows between the two types. I got these on discount at Michaels with a coupon. I spent about 2 hours cutting it off the vines.

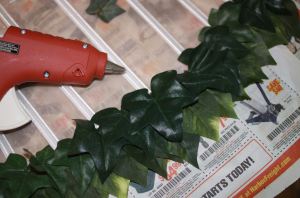
Starting Rows at the bottom to give an overlappped feel.


I am starting at the bottom, rather than the top because I want it uniforma nd smooth when I am done. I will also be adding some different color (fall colors) at the top for interest. I am using all temp hot glue and using a stick to push it down. Still burning the hell out of my fingers, so now I am applying it with a large set of tweezers to lessen the chance of burns. When the glue dries it will make the corset hard as a rock, so fair warning. This is why I chose the boned bustier rather than a  bodysuit. It will be easier to hide the seam on the side and be much easier to get into by myself. It will also hold it’s shape despite the hard glue because of the boning in it.

Takes a ton of Ivy!


this is almost 7 rows done, 1/4 way up the front. It’s a good thing I bought a ton of Ivy because I am going to need it. My fingers may suffer the wrath of hot glue but I love the way it’s coming out so far.

More later!

Jane