Posts tagged ‘Custom Costume Builds’

Supergirl Costume Day 1

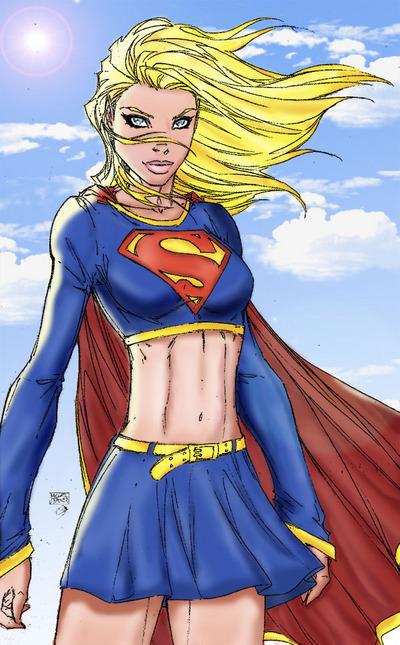
I heard that they were having a Guinness Record Attempt for most Superheroes at DragonCon this year, so I have decided to make a Supergirl Outfit. Supergirl has always been one of my favorite Comic Characters. One of the First Comics I ever bought as  a Kid was Supergirl!!!  Hey, I’m already blonde, so I got a head start.

Her looks have changed over the years. As well as her Origins. For my Recreation, I’m sticking with the Turner Redesign/Kara Zor-El. 


I had a Leotard/Skate Outfit Pattern from Green Pepper. I modified it but removing the bottom and shortening it to a crop top. The pattern is easy and needed very little adjustment. I am using Spandex Lycra 4 way stretch knit in Royal Blue. Some of the Supergirl pics depict a more  turquoise color but I’m trying to get closer to Turners Redesigns when Superman Returns was released. I think the Tradition Royal Color is better anyway.  For the Skirt, I am doing a basic Circle skirt. I altered the pattern by adding a Waistband and I will be adding Belt Loops. I pretty much have everything I need for this costume lying around the house. Except the Yellow Belt. Which I have a feeling I will be doing some sort of Leather dying or making one from scratch. I even have the boots, I will add the Gold/Yellow Top design and make it removable so I can use the boots for something else later. 

Before closing up and finishing off the Crop Top (Which will be edged with gold fabric trim), I decided to do the applique for the Supergirl Symbol. I traced the Symbol over and over until I felt it was the right size and looked the way I wanted. I ended up freehanding most of it. The variations of the “S” seem to differ from picture to Picture. I tried to get as close as possible for a freehand. 


Using a Double Backed Fusible Webbing called “Steam-A-Seam”. I traced the Symbol backwards on the wrong side of the Yellow Fabric for the Cutouts. I also Traced a Separate one of the Shield Symbol, Also on the wrong side. In this case, The Dull side is the Right Side. I do not like the Shininess of the Yellow Lycra fabric I found. It’s too shiny for Supergirl. I much prefer the muted tone, so that’s what I’m going with. 

Steam-A-Seam 2


 After Cutting out the pieces, I peeled the backing off, leaving the fusible webbing behind. It’s repositionable. So it’s best to put the garment on first and find the position and mark it. 

Here’s s the applique before doing the finishing on the machine. I plan on using a Satin Stitch to give it a professional appearance and to hide my cruddy cutting. You need really sharp scissors when working with lycra. 

Logo before Machine Stitching.

 Just remember, when working with knits. It’s best to use other knits for applique because of the Stretching. The fusible webbing helps it keep it’s shape.
She-Ra Blog Part 5

Finished the hem on the dress. I ended up taking about 3 more inches off. And doing two separate hems. One for the lining and for the dress. It gives a smooth line and makes it easier to do repairs if needed. The lining hem is slightly shorter than the dress and I tacked it in about 3 places to keep it from riding up.

I finished the chest piece decoration and the wing-like decoration on one side. I used some red vinyl that I had for the molotov costume and put about 5 layers of craft paint on it. The upper wing-like decor has a fun foam backing to make it stiff and stand up. the chest piece has buckram glued to the back to give the glue something to hold onto. I do need to touch-up the paint a bit on it, but otherwise done.

To make the pattern for the chest. I pretty much freehand it on this one. I could not find a direct on pic of the chest piece. It seems all the screen captures have her at an angle. So using several reference pics. I just freehand made the pieces until they looked about right and sized them to the front of the bodice. I just reversed them for the other side.

Pattern Cutouts

 I then traced the patterns onto the painted vinyl. Repainted over any leftover pen marks.

I used a Glue called GemTac to adhere the buckram to the back and to adhere the pieces to front of the bodice. Stacked some heavy books on it and then let it dry. It does not not take long for GemTac to set up, dries clear and after 24 hours can get wet. Since the dress is white, I anticipate getting dirt and smudges on it, so I will most likely need to hand wash it in the future. GemTac was the perfect glue as it is used for rhinestones and attaching gems to clothing. Good Stuff!

Chest emblem

I will be using a different cabochon than the one pictured. I have a turquoise oval stone that I will be using. The one in the pic is used as size reference.

I started on the cape, well. Pretty much done with it except for adding ties to the ends and buttons on the inside of the bodice to attach the ties. Basically it’s a large draped rectangle. . I made it from some very soft satin I found. Like pajama satin, not the stiff stuff. It drapes really nicely., even lined with the same fabric.

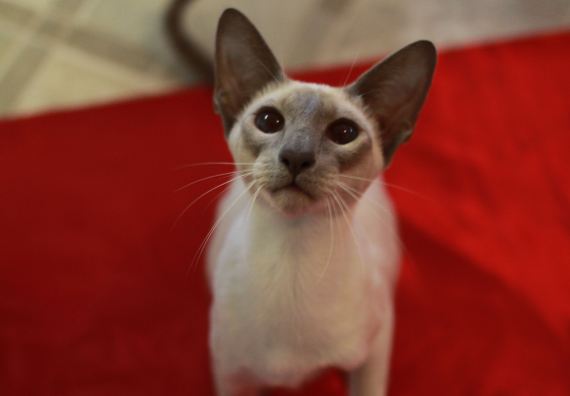
Here’s my Cat Lily “Helping” me cut my cape fabric.

Lily likes the Red Satin too.

Not much left to do, just odds and ends on the She-Ra Costume itself. I still need to make a Sword and shield and the decor for the boots.

Jane

She-Ra Update/Molotov Costume


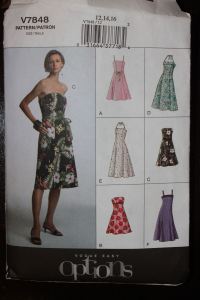
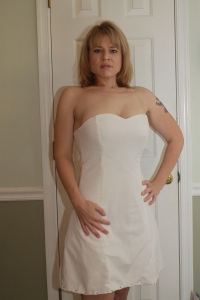
I finally solved some sewing issues I had. I have not sewn anything since my body has changed,so I had a bit of trial with fitting the bodice for the simplicity pattern. I spent hours working on it and still could not get it to sit flat like I needed. So I decided to completely re-do the dress using Vogue Pattern V7848. It’s an A-line dress pattern that came with many options including strapless. So much better!! No bitching and fighting with the new pattern. The bust ease is huge though. According to the size chart (I wear a Misses size 4/6 in Off the rack), It says that my bust is 12 and my waist/hips are a 8/10. Hmmmm…Still had to do some altering anf after reading other people’s experience with this pattern, I was told that the bust ease is at least off by 2 inches. I cut the 12 and widdled it down about 2 inches in the bust and almost three in the waist. In hindsight I should have cut the 10. For those not experienced with commercial patterns. They do not use your real world off the rack clothing size. They o by body measurements starting at size 6. So 6 is like and Xtra-Xtra Small.  Patterns are also made for B Cup sized women. I guess they consider it average. Personally most women I know are over C cups. Me…eh…DDD/E. Can you see where my issue is now? If it fits in the bust, the waist is always huge. With the exception of Spandex and stretchy clothes, I have to tailor everything. Button up blouses? Forget-a-bout-it! Can’t wear them unless I make them. 

So I worked the new Voque pattern out. View C. Very pleased. Even the altering was super easy on this one. It’s rated for a “Easy” sew. Personally, beginner folks can do this but the boning might give some people issues if they have never put any on a garment. 

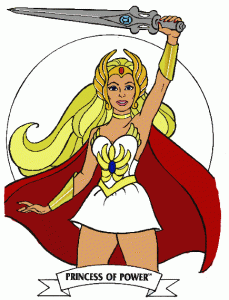
I altered the pattern in the bust, waist and plan to make it much shorter (Have not hemmed yet). I decided because the fabric was quite see-thru, to completely line it with the same fabric. I just barely had enough. I also changed the front bodice line from straight to a more sweetheart bustline in order to get the same silhouette as She-Ra in the cartoon. 

Dress pattern, I used View C

Here’s a pic before hemming (I need to iron too, so forgive the wrinkles) 


I will finish the hemming tonight (by hand..ugh) 

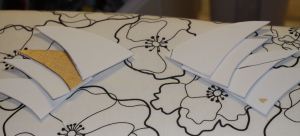
I also cut out the bodice top decorations. And made all the patterns for the front dress emblem to cut out later. 

Fun Foam cutout for the bodice top

The front of her gown looks like this… 


I will do the belting more like the original reference pic I posted in my first blog. I think it adds more character and interest. 

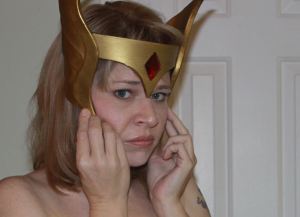
I need to go retrieve my Wig from David’s, so I can adjust the headdress. But here it is. 

Why do I look so Glum? Oh Yeah, the cat threw up...lol

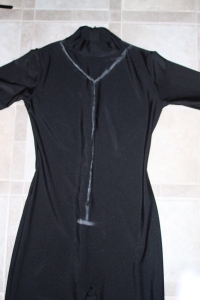
As for my other costume, Molotov. I got the unitard. It’s a Bal Togs, good quality. I traced an opening, cut out the mock neck and cut away at the fabric until I got the right shape. I them finished the edges with a roll hem…easy peasy. Next the engineering comes with using clear straps and double-sided tape. For final fitting I’ll have pics. 

Unitard cutting lines

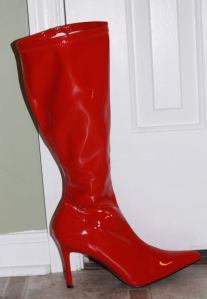
 I also got my red sexy boots for the character. Heck, I’ll wear them out. they are actually comfy! 

Boots for Molotov

I finished the eye patch and the Hip belt (No pics yet). Still working on turning vinyl strips into a gun belt and holster. I ran out of E6000 Glue which is the only thing that seems to work on holding the vinyl together. So another trip to Wal-Mart is in order. 

Jane

Update on Costumes

I’m sorry I have not updated. I’m having some health issues right now. And when I feel bad, I can’t work on much because I end up screwing it up.  That being said, I did cut out the bodice for the dress. It was not working at all. Being the body type that I am (Hourglass figure), my guess is most commercial patterns are just not made for me and my upper body structure. I did about 3 modifications and it still was not working , so I’m back to square one. After looking at several She-Ra photos (both costume and cartoon/Drawings), I’ve decided that her upper body area is definitely armor-like. This will solve some of my issues with getting the correct shape. As someone who has made many a corset over my lifetime, I can’t figure out why the pattern was not working until I realized that the measurements of the pattern were not the measurements listed on the back. They are off by about 1 1/2 inches! Just to be sure, I measured about 4 times to make sure I was not doing something wrong. I have only had this happen once before and that was a McCalls pattern years ago. I believe that one gave everyone problems on the Great Pattern Review. So I am using my creativity here and doing something totally different. I am taking the longline bra (with molded cups) and I am going to cover it like I would a belleydance bra. It’s a little trickier with a longline and I will still need to sew the seamed pieces together. But I really want that molded armor look. I will be making some armor pieces to run slanted across the breast and chest and then adhering the Gold Symbols onto that. That way I can remove them if I ever decide I need the bra for something else. I’m hoping this works. And I hope I feel better soon. I have too much to do before dragoncon.

Poison Ivy, I have decided may get shelved for the time being unless I can get everything else finished in time.

Today my Unitard for the Molotov Costume Came in. This one is actually not going to take too much time. I have the boots, red vinyl to cover all the Belting and to make the gun holster and knife holster. I ordered a red wig that I think is perfect . For those who don’t know who Molotov is, She is Molotov Cocktease (yes…I know..lol). She’s a character on the Venture Brothers cartoon on Adult Swim. I totally love that show and went back and caught a few I have missed while being under the weather.

Here’s a pic of the character:

She’s a cool character. A tease and you have to be pretty ballsy to wear an outfit like this. It’s why I’ve been doing my stomach crunches!. I definitely got the cleavage for it. The suit will be a bit of an engineering process. I have clear strapping made for bras that I will attach under the breast to keep any wardrobe malfunctioning from happening.  weaponry may be a problem, so I’m going to have to come up with something. I have 2 airsoft glock 17’s but I doubt they will let me into the Hyatt Hotel with them. I think I still have a fake knife leftover from Halloween but I would love to make a sword to go with this one!

So She-Ra is getting done. I’ll update in a few days and hopefully the dress will be done. I finished the skirt part and everything else is complete except the bodice, so I’m happy about that.

Jane

Poison Ivy Day 2

I have the corset almost complete. I ran out of hot glue, soI have just a bit of the back to finish. The top will be finished last with fall color leaves.


Here’s the full front of the corset

Full front almost complete

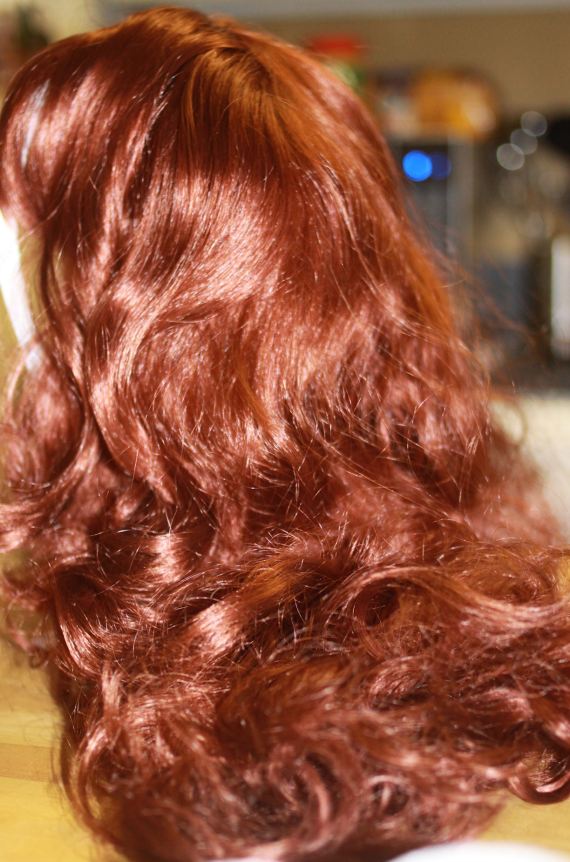
 While I wait to go get more glue and some other things I need at Walmart. Here’s my ideas for the wig and hairpieces.

Syr

Poison Ivy Wig Choice

 Here’s the Styrofoam I cut to make the Buns. When I was doing theatrical costuming we used to use forms to make buns and historical hairstyles. You always wonder how people had so much hair back then but the truth is they used them too!

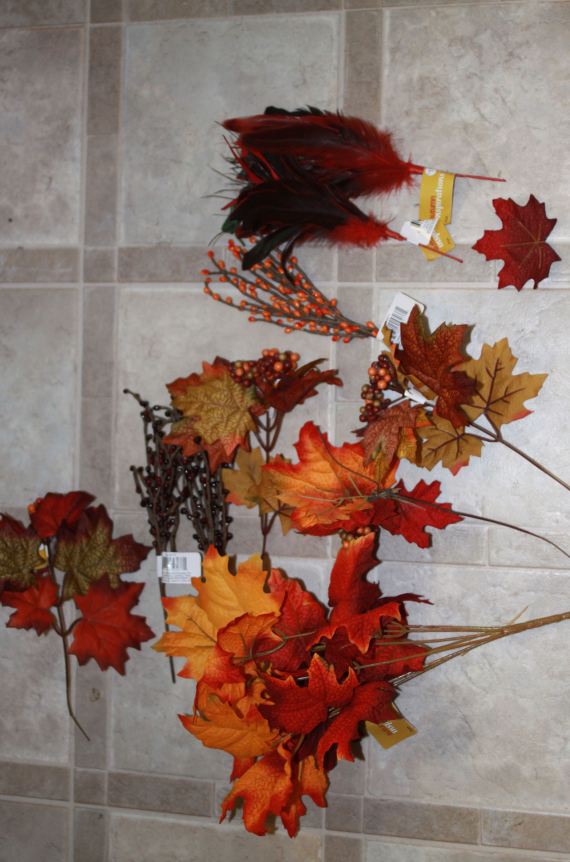
Hair Decor

 After forming the hair, I will decorate with leaves and various fall themed “Stuff”.

Still working on ideas for the boots. Thinking about painting a pair green and decorating with leaves. I’m headed to the thrift stores tomorrow to see what I can find.

Gauntlet style gloves and cape will follow after the hair and boots are done. Still debating about green hose, regular dance tights or a combo of flesh tights with ivy painted on them. I don’t want overkill on the foliage.

So far this has been a fun costume project and I can wait to get dressed up for a photo shoot in it. The makeup will be fun too!

Namaste!

Jane